↧
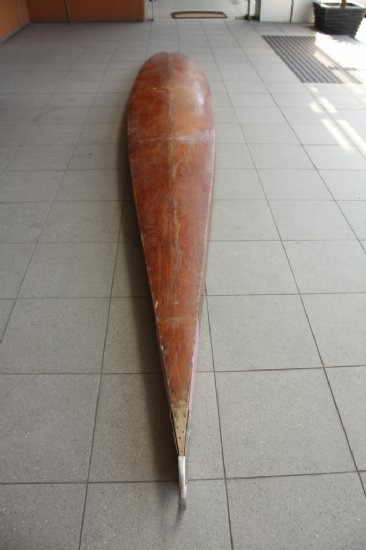
Bill Wallace Toothpick
↧
Building a Hollow Wooden Surfboard - A Big Guy Nugget called "Fat Rick"
Namaste tax dodgers and welcome to this installment of building a 7’6” paulownia hollow wooden surfboard - A Big Guy Nugget. I wanted to share this experience with you for the sake of my ego. By now I hear you thinking, good Buddhists don’t have egos. How right you are Oh wise and noble reader. No one likes a smart arse so let me please continue. For the record I am an appallingly bad Buddhist (and person for that matter) with a dodgy self esteem, continually driven by the fact that Gayle E. repeatedly (and allegedly – added by my lawyer) called me a stupid moron in grade four (or was it grade 5?) and this event has undermined the foundational fabric of my self confidence to this day. Bitch! One day I’ll build a bridge.
I’m not really even a Buddhist but I thought the name Wood Buddha would elevate my reputation within the international wooden surfboard building community as a fringe guru wooden surfboard builder, and alternative surf craft aficionado to the dizzy heights of stardom. I’m also an appallingly bad husband as well, just ask Mrs Wood Buddha. I’m always “not listening”, “losing my wallet and my keys to the car”, not wanting to “want to do the dishes”...the list goes on and on...and I love using “quotes” when I write. It makes me feel intellectually superior. Whatever! She’s too good for me anyway, very patient with my bad memory, degraded eyesight, my fat guts and thick rails. But I was built for comfort not speed. No Usain Bolt , more a suave, fat, hairy, middle aged chimp. The truth is, that if I wasn’t married to her, who knows where I’d be. Probably living out of a skip bin, eating discarded KFC zinger scraps, and habitually annoying decent folks for bus money and half smoked durries, wearing stained ghosties and smelling like a dead wombat’s arse. How could I not smell like a dead wombat’s arse if all I ate was discarded KFC zinger scraps. But I digress and am getting into therapeutic issues. Back to the board.
My idea for this hollow wooden surfboard was loosely based on a Geoff McCoy Big Guy Nugget, a board that apparently has a mind of its own, and surfs itself without any regard for the lack of skill of the rider. Sounds like me all over. Check! A few rough measurements give or take a few inches here and there to allow for mistakes made during lonely, drunken building sessions on Saturday nights after Mrs. Wood Buddha has kicked me out of the house on the count of my loud, drunken and out of tune renditions of the Sunnyboys'“Alone with You” . Damn it, there go those quotes again.
I made contact with a couple of other wooden surfboard building enthusiasts for advice. I was lectured on the psychology of wooden surfboard building and how the experience will make me a better person despite the fact that it will take me three times as long as I had planned, I’ll use four times as much wood as I had planned and I will have numerous tanties like my three year old kid, throwing tools at my shed wall in fits of rage and frustration because I forgot to measure twice and cut once and I will be constantly making trips to restock my Paulownia timber cache. I’m not easily deterred, and thanking said experts for their advice, I accept their blessing, hit the road and take an oath to commit to this project through sickness and in health, for richer or for poorer...blah, blah, blah.
I picked up some 150mm x 50mm Paulownia planks, rough sawn and straight as Hitler’s moustache. I loaded the timber on the Buddha-Mobile roof racks and headed off to my Ashram to begin the incarnation of my new wooden surfboard. Yeah baby! I am oozing with enthusiasm but this too shall pass.
I designed the wooden surfboard using AKU Shaper and printed out the templates with Hollow Board Template Maker allowing 24mm for the solid rails. Stringer and ribs are 6mm Paulownia, the first inside rail band is 4mm Paulownia with the remaining four rail bands being 5mm Paulownia. The deck and hull skins are 6mm Paulownia. Paulownia has a tendency to split so to add some strength to the stringer and ribs, I laminated one side with 4oz fibre glass and epoxy resin.
Stringer and ribs, cut and shaped using a bandsaw and bench disc sander, with one side laminated with 4oz fibre glass and epoxy resin.
Gluing the ribs and stringer on my trusty jig using Gorilla Snot (marine epoxy resin thickened with Aerosil). Gorilla snot works a treat on the internal structural framing. White, light, and strong. Naturally extracted. No gorillas were harmed in producing this product.
Gorilla snot in zip tied plastic bag for mess free and easy application. A great little piping bag technique I stole from a local pastry chef.
The application technique. I just cut off one of the corners of the plastic bag to let the snot ooze free.
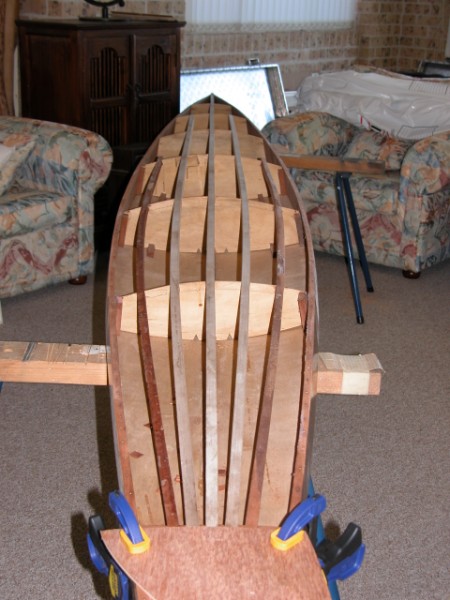
Gluing and clamping the ribs. This is the view from the wooden surfboard nose.
Gluing the centre top baton to the top of the stringer. This is a 6mm x 20mm strip of paulownia running down the length of the board. It effectively turns the stringer into a T-Beam and provides some additional strength under the deck but is mainly used to add some stiffness to the frame when I vacuum bag the deck and hull skins on.
Nose and tail blocks glued and two batons under the deck for additional support. The nose and tail blocks add a little extra weight (90 grams) but provide some added protection for the wooden surfboard especially since I’m a clumsy bastard and I am always dropping my boards. I’ve gotta stop drinking.
Ready for the first rail band.
The first 4 mm rail band is glued. The timber is steamed to the radius of the nose and tail blocks using one of Mrs Wood Buddha’s damp face washers clamped to the wood for 10 minutes so the water penetrates into the timber. I then apply pressure with my hand to the rail end bending it to the contour of the nose or tail block as I heat it with her steam iron. I zip tie the ends to the frame for 24 hours and then glue the rail to the nose and tail blocks. Thin paulownia bends easily using this method.
View of the nose. The rail band is zip tied to the end of the ribs.
...and a closeup of the nose.
The view from the tail.
Bending and gluing the rail band for the opposite side.
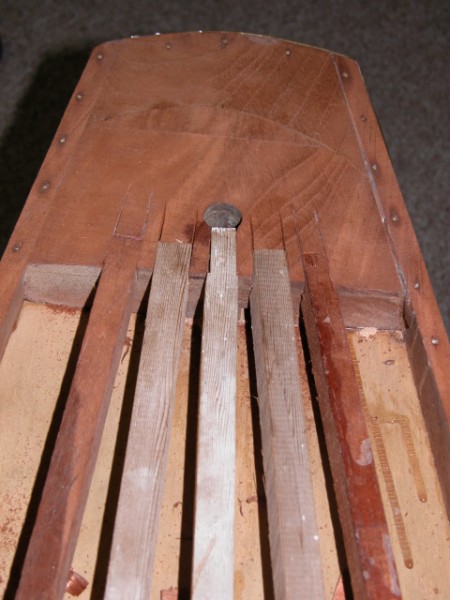
Detail of the rail overlap joint at the tail bock.
The steaming, and bending process using Mrs. Wood Buddha’s face washer and steam iron. She made me pay for that. Oh, how she made me pay! I was a very naughty boy and had to go to her room ;-)
Gluing the ribs to the rail band. A mortise is cut in the rail that aligns with the tenon on the end of the rib. The mortise can also be drilled to the width of the tenon using a forstener bit. Not as neat but a lot quicker and the gaps can be filled with Gorilla snot. Paulownia is a very soft timber and cutting the mortises is best done with a razor sharp craft knife. My chisels tend to tear the grain.
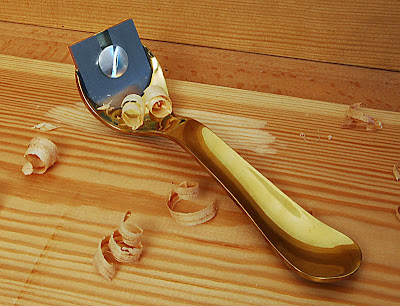
Shaping the rail band to the upper and lower contours of the ribs using my trusty “Kunz Beaver Tail Palm Plane”. I’ve always wanted to use “Beaver” and “Kunz” in the same sentence. :-)
Soaking up some rays outside the ashram waiting for the deck skin to go on. Weighing in at 1250 grams.
Using my thicknesser on the 150 mm x 6 mm paulownia boards. My home made "X" factor thicknesser stand folds away nice and flat in the ashram. I rip saw 12 mm x 150 mm boards from a 150 mm x 50 mm rough sawn plank with my band saw first and then use the thicknesser to profile the boards down to 6 mm.
Making the panels for the deck and hull skins. I clamp two of the 150 mm x 6 mm panels side by side with sash clamps and tape and glue the joins with polyurethane glue. I then place a sheet of plastic over the panel (minus the clamps) so glue doesn't make a mess, and then put a 600 mm x 2400 mm sheet of ply over that. I then weight it down with my special clamping bricks as the glue sets. It makes for a a nice flat panel 300 mm x 6 mm. I then repeat the process for two of the 300 mm panels to create a panel 600 mm wide. Polyurethane glue dries in a couple of hours and the panels are ready to go.
One of the panels ready to go. Note the blue paint on the end grain. This is so I can pattern match the wood grain of the panel.
Marking out the deck allowing for an extra 5 mm around the edge.
4 oz fibre-glass cut and ready for a coat of epoxy. The fibre-glass is applied to the underside of the deck for extra strength.
I squeegee the resin on and leave for about 40 minutes until it's not tacky.
I apply gorilla snot to the upper edges of the frame, and tape the deck skin in place. I also tape the hull skin in place without glue to provide support for the vacuum bag.
Then into the vacuum bag and bring the vacuum pressure down to 10 - 15 inches of mercury (Hg). My vacuum pump can pull almost 27 inches of Hg which will crush a hollow wooden surfboard (as I have learned from previous experience).
In the vacuum bag for 6 - 8 hours to allow for the epoxy to fully cure.
My trusty venturi vacuum pump that runs off my compressor. Available in kit form from the U S of A.
6 - 8 hours later and it's out of the vacuum bag.
Fibre-glassing the inside of the first rail band.
Gluing in paulownia wood blocks for the centre fin box and the side fin plugs using gorilla snot.
A view of the Goretex vented leash plug from the deck.
The air channels and hole for the Goretex vented leash plug. I added some grooves on the underside of the ribs for drainage, just in case any water manages to get in. Should this board ever leak, then the water can drain to the tail of the board. I'll just drill a drain hole through the tail of the board to let the water go free.
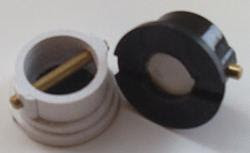
A view of the vent block towards the nose of the wooden surfboard. This is just under the deck skin. I installed a plastic vent with screw commonly used in windsurfing boards.
Ready for the hull skin. The same process that's used for the deck skin. A layer of 4 oz fibreglass, with epoxy resin and gorilla snot on the bottom edges of the frame. All the inside surfaces of the surfboard frame have been sealed with epoxy resin.
Then into the vacuum bag for 6 - 8 hours while the epoxy cures.
The next step is was to clean up the edges of the deck and hull skins with a hand plane and sanding block to get the board ready for the rail bands. Unfortunately I don't have any photos for this part of the process.
Gluing the the four 5 mm thick rail bands with Polyurethane glue on each side of the wooden surfboard. The 5 mm paulownia was a bit of a challenge to bend around the tail and nose of the surfboard even with the steam iron technique. I managed to snap a couple of the rails near the nose and tail. Easily fixed though. Just trimmed the rail band neatly back from the nose with a dovetail saw, cut a new piece of paulownia the replace the piece that broke, boiled the shit out it in a large saucepan for about 20 minutes, and the piece bent like butter. I made a jig to clamp it in place while it dried overnight. I then glued using the same jig to hold it in place. Thanks to Geoff Moase from Dovetail Surfboards for that little gem of advice. 4 mm rail strips are definitely the go.
The jig and strap.
Another shot of the rail bands going on. A very time consuming process.
The final rail band near the tail. I went for a 4 mm thick rail band to see whether it was easier to bend. And yes...it was!
Another shot of the final rail band going on. I went through a ton of masking tape to glue the rails on and thought there has to be a better way. On my next board, I will try using a timber jig cut to the outline of the board to hold the rails in place.
Trimming the the tops and bottoms of the rails to the contour of the wooden surfboard using my Number 220 Stanley Block Plane and Kunz Adjustable Spoke Shave. The surfboard is really starting to take shape. The glue join gaps between the rail bands will get filled with epoxy filler later.
Drilling the holes for the side fin plugs using a purpose made jig and 30 mm Forstener bit. Some masking tape around the area helps protect the timber from any potential slips.
A router and jig for the 10" fin box. A slightly nervous moment. Lots of meditation and measuring twice before I cut this slot. The good thing about this jig is that you can do a practice cut in the plywood base first and check this against the fin box for sizing.
Gluing the centre fin box using epoxy glue.
Shaping the rails with my trusty Kunz Adjustable Spoke Shave and 80 grit and 120 grit cloth backed sand paper.
After a final sand with 240 grit disk and my random orbit sander, the wooden surfboard is starting to take shape.
The view from the bottom. Still waiting to install the side fin plugs. This surfboard was shaped for a single fin so it shouldn't really need any side fins. The rail is quite sharp from the rear of the fin box to the back of the board as per Geoff McCoy's single fin shaping philosophy. And if you have any sense you don't fuck with Geoff's philosophy. I've installed them as an option should the arse of the board slide out.
Installing the side fin plugs using "Techniglue" an alternative to Gorilla snot. This product dries white which I think doesn't look as good as standard unthickened epoxy which dries clear. Horses for courses I guess. The cant and toe angles are copied from another 7'6" board I have. I know they work well on that board.
Two coats of resin later and the deck is done. I allow 24 hours drying time between coats.
The view of the underside of the tail with a custom made camphor laurel fin.
The view of the underside of the wooden surfboard with the fin installed and the epoxy dry. Niiiccce! If I must say so myself.
Catching some rays outside the ashram. Note the faded band lines across the timber on the deck. This is caused by the stickering timbers that are used to space the timber while it is drying. Apparently the supplier of this timber is now stickering his paulownia on its narrow edge to avoid these lines. It usually only occurs near the outside surface of the timber.
Cutting the fin from 8 mm thick camphor laurel. The timber was sourced from a fire wood pile on a farm in Northern New South Wales. I quarter sawed the logs which were about 200 mm in diameter, run the planks through my thicknesser and then cut the fin plan shapes out on my bandsaw.
Camphor laurel is listed as a noxious weed in Northern NSW so it's great to be putting this timber to good use. When cut, this wood fills the ashram with an amazing smell. It's truly a pleasure to work with. I foil the fins using some custom made hand tools and cloth backed sandpaper.
The starting point. A camphor laurel log.
Two layers of 4oz glass and epoxy resin on each side gives the wood additional strength and water resistance.
The fin after the final fill coat. It's just a matter of shaping the top of the fin that goes into the fin box, drilling the holes for the pin and bolt, gluing in the pin and fitting.
Surf Report
Well I managed to take Fat Rick out a couple of times for test runs and I was more that happy with its performance. It passed the "sink test" with flying colours and managed to stay afloat for both sessions which is not bad considering my weight (90kg). The board leaks a little bit, taking on about a quarter of cup of water over a 2 hour period. I did a leak test of the board after my first session, by coating the entire board with kids bubble mix and pumping compressed air into the air vent. I couldn't for the life of me see any bubbles forming on the outside of the board (indicating leaking air), near the timber seams, fin box, fin plugs and leash plugs so I can only assume that water is passed the screw plug seal in the air vent. I drilled a hole in the tail of the board to drain the water out. Sweet as.
The board floats me nicely, paddles easily, picks up waves easily and turns on a dime. During both sessions the surf was a little full, spilling and about 3' - 4'. I am very impressed with the dome bottom and fat tail and the board turns easily. Unfortunately on the first day I was the only one out which makes it pretty difficult to get any photos of it in action but I've included a photo to show the wave conditions on the day.
Hit my fin on the rocks. Bummer! I have some improvements in mind for version 2 of these wooden fins. This should add some strength to top of the fin that sits in the fin box. Stay tuned.
↧
↧
The Wooden Board Day - Currumbin Alley 2013
The Wooden Board Day at Currumbin Alley this year (2013) was a stand out. Over 100 wooden boards of all shapes and sizes were dusted off and put on display by their proud creators and owners. It was an absolute pearler of a day with 2' - 3' of swell, light offshore, sunny, temps in the mid 20's and about a million people out in the lineup at the Alley.
This was my second Wooden Board Day and I had my 7'6" Big Guy Nugget "Fat Rick" on show. I have to say there was big time board envy on my part. The quality of craftsmanship put into all the boards on show was sublime. Wooden Board Nirvana!
It was great to see some of the legends of shaping and surfing present like Tom Wegener, Dick Van Straalen, Richard Harvey and 84 year old Barry Regan. A good commercial representation also from Firewire, Dovetail Surfboards, Surfing Green, DVS and a raft of other board builders. A big thanks to Grant Newby for organising the day. Awesome job!
A couple of Timber Tek models from Firewire. These boards were attracting a lot of attention. Who said wooden boards aren't performance boards?
Grant Newby's 10' Alley Slider finished with lanolin. I took this baby out for a couple of waves. Very nice.
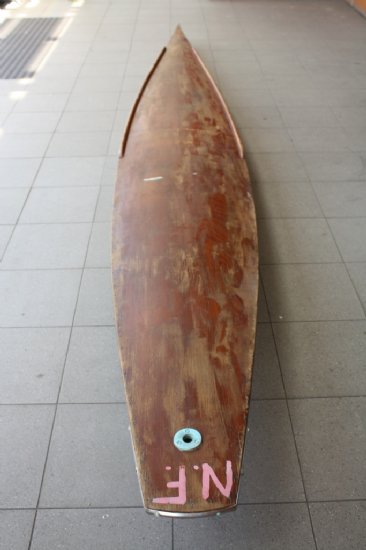
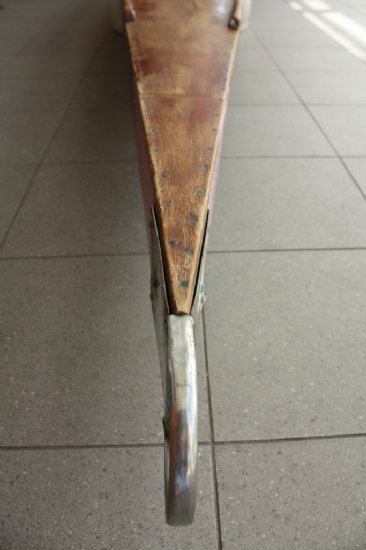
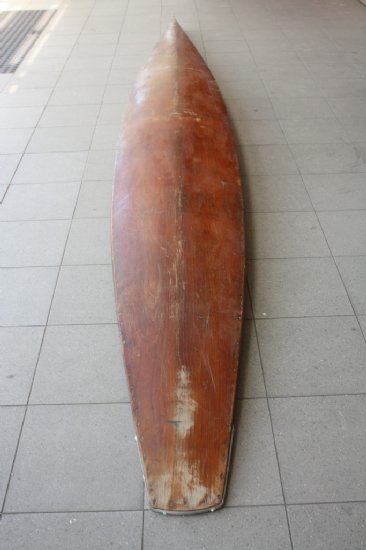
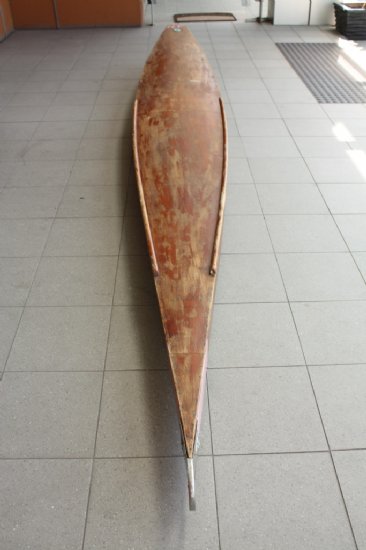
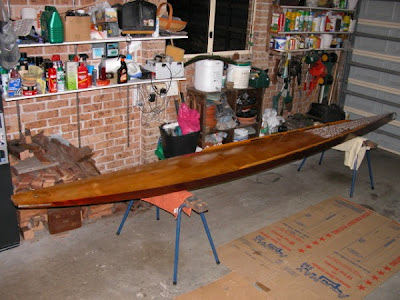
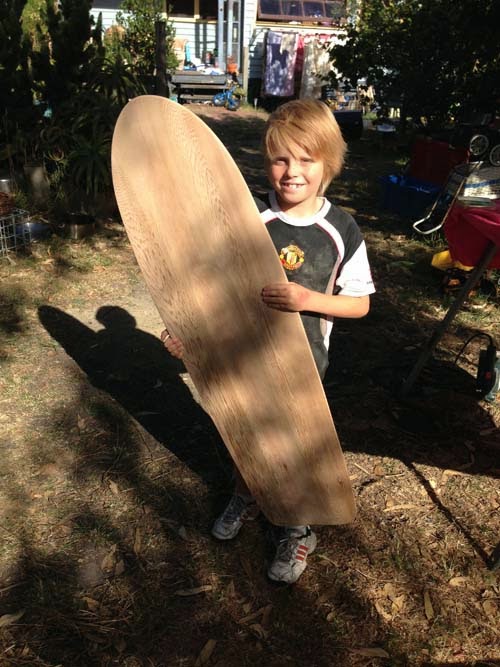
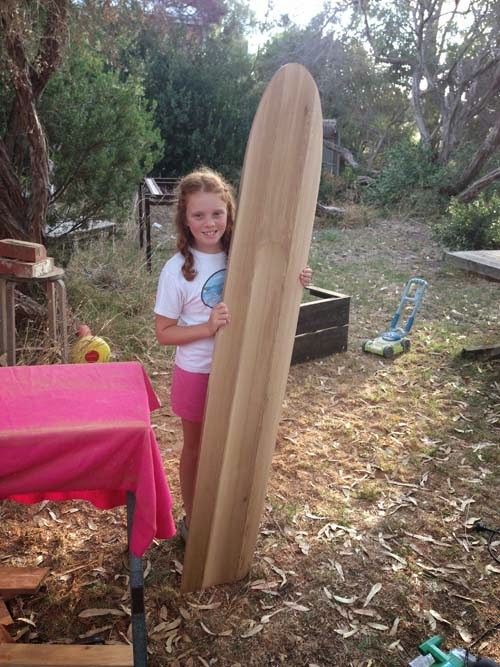
Some Bill Wallace toothpicks from Cameron Byron. Tom Wegener chewing the fat with some wooden board enthusiasts. These boards are amazing to watch in the surf. They get onto waves even before the SUP's do. An interesting fact about the stainless steel handles on these boards. Not for dragging the board on the beach. They are for pushing (punching) the board nose out through big surf.
A very nice quiver from Craig of Nimbin. Some Nuggets, a fish and an egg. Sounds like breakfast. The wood inlays on these boards are stunning. BTW two of these boards are for sale.
A DVS creation.
84 year old Barry Regan from Ballina has been shaping for 50 years.
A CNC creation from Mike Grobelny of NZ. Bamboo deck skin over a paulownia body.
A nice selection of boards from Geoff and Jack Moase at Dovetail Surfboards.
Grant Newby going over the finer design details of his latest Mini Simmons creation.
Firewire Timber Tek creations. Lots of interest in these babies.
I swear Grant Newby has a Mini Simmons breading program going on.
Longboards, longboards and more longboards!
This is a 16' toothpick built by Tom Wegener of Noosa this year. A modern spin on an old design.
The board leaning on the tree branch is one of Tom Wegener's 18' longboard creations. The fin on this board is huge.
A 9' pintail from the Purveyer of Salty Sleds.
The "Godfather" Richard Harvey (in white hat) talking about his balsa wooden board kits. These boards are unbelievably light in weight. You can pick this board up with two fingers.
↧
Building a Foam Core Wood Surfboard - A 9'1" Longboard Part 1
Namaste Arborial Aquaphiles, and welcome to this installment of building a Nine-One Mal called.....well I don't actually have a name for it yet but I'm open to suggestions. It's a bit of a dilemma naming a board. Well is it for me. A bit like deciding on a name for your kid but not really. I mean there have been some shockers in the kid naming space. Arthur Brain, Dwayne Pipe, Gaye Males, Jack Goff. I mean what were their parents thinking? Kids names are a little more critical than surfboard names though. Stuff up a kid's name and poor old Jack Goff will never hear the end of it from his mates in the school playground but go with a lame board name and probably no one will even raise an eyebrow.
Anyway, there's a prequel to this epic. I still get a little emotional telling it so bare with me. This wooden board was originally my second, and it started its life as a hollow wooden version. It all went terribly wrong the moment I attempted to use my vacuum pump and bag to put the deck and hull skins on. I had spent and inordinate amount of effort and time measuring and scribing out the plans on butcher's paper, and meticulously building the frame. Then came the day to glue the skins to the frame. Being the cautious bloke that I am I decided to do a dry (glueless) run first. I taped the skins to the frame, slipped it all in the vacuum bag, sealed it up, connected it to the pump and sucked the bejesus out of it. Now my pump pulls a vacuum close to one atmosphere of pressure, about 27" of Hg (mercury) which is a lot for a hollow wooden board. It was all going gang busters when I started to hear the sound of the board creaking and groaning under the pressure of the bag, kind of like a U-Boat that's been hit by a depth charge. As the skins started to bow inwards between the frame ribs, I thought to myself, "Wood Buddha, this can't be good". At that moment and as I dove vertically through the air to do an emergency disconnection of the vacuum hose, kind of like a Wallaby scoring a try (which is rare these days), I heard a loud "CRACK!" and what I ended up with is a crushed board.
I sulked for month!
The following pictures tell the story.
Now we gotta make the best of it, improvise, soldier on, adapt, modify, overcome, Darwin, I ching, whatever man, we gotta roll with it. Acceptance of the impermanence of life and all that other Buddhist shit. Whatever! Mrs. Wood Buddha gave me a few upper cuts and I crawled into a corner and took a dog with me to lick my wounds.
Back to the story. So what I was left with was a frame with numerous crushed ribs, and deck/hull skins with several fine cracks about 500 mm long. The frame was pretty much a write off so I hung up on my ashram wall to remind me of past failure and keep my ego in check. I decided the skins were worth saving. I could build another frame but I was keen to try another technique developed by Grant Newby of the Gold Coast and currently adapted by Firewire Surfboards for their Timber Tek range. A Paulownia skinned EPS core surfboard.
The first part of the process was to design the full board with final dimensions in AKU Shaper. Once I was happy with the outline, profile/rocker, rail profiles and volume I saved the board file. In this case I named the board "mymal91.brd". Maybe that's what I should call the board, "My Mal"? Pretty lame really. I then opened the exact same board file in AKU Shaper and renamed it something different like "mymal91EPSCore.brd". This is the EPS core that I'd get shaped on an APS3000 machine. I then loaded the original mymal91.brd file as a ghost board and used this as a guide for adjusting the outline, profile and rails of the EPS core. I allowed for the 6 mm paulownia deck and hull skins, and 24 mm (6 x 4 mm) all around the outline for the rails. I also squared off the rails. Now this all sounds a little complicated, but once I got a bit of practice with AKU Shaper it wasn't that difficult.
Some screen shots.
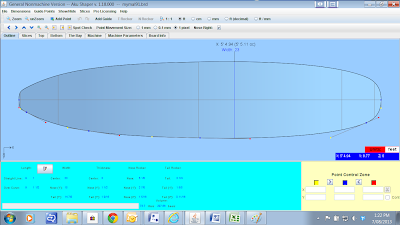
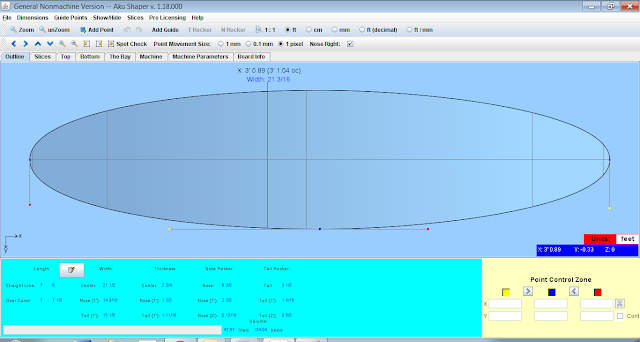
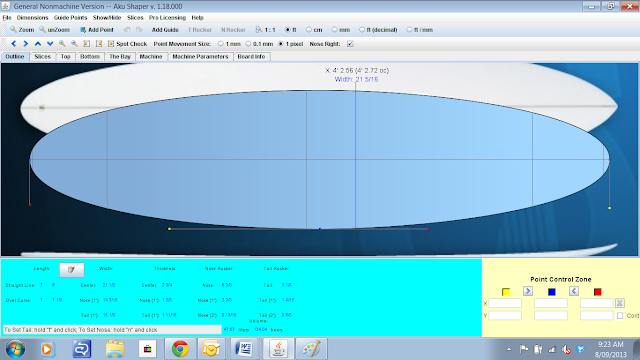
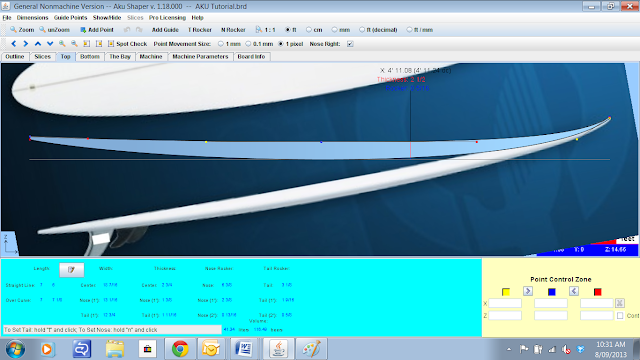
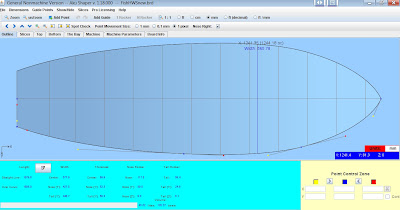
The outline in AKU Shaper.
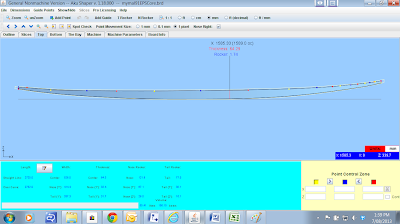
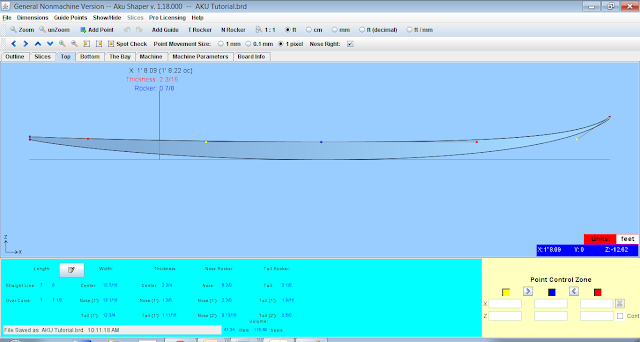
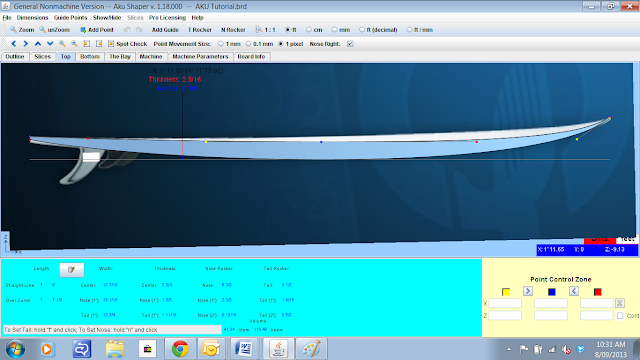
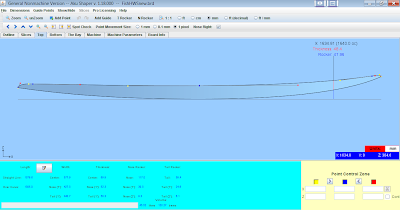
The board profile/rocker.
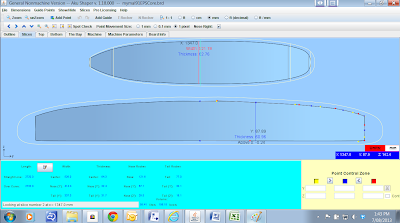
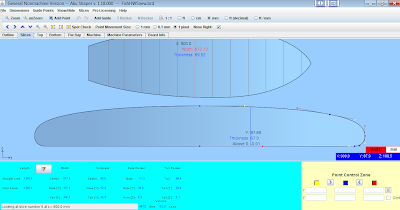
A view of the centre slice with a fairly full rail. The bottom contour rail to rail is fairly flat. It transitions from a concave in the first half of the board to a slight roll in back half of the board.
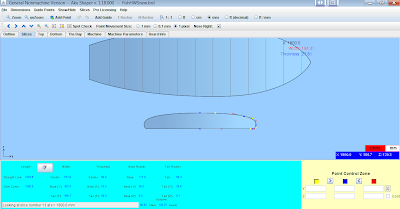
The slice 300 mm from the board tail. There is a slight roll on the bottom contour of about 4 - 5 mm.
The slice 300 mm from the nose. Note the bottom concave.
This is the EPS core file. The original board file is imported as a ghost board and has a white outline. The EPS core board is reduced by 24 mm all around to allow for the paulownia rail bands (6 x 4 mm).
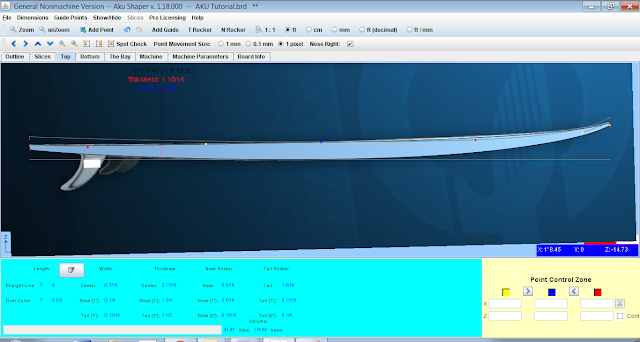
The view of the profile/rocker with 6 mm taken off to allow for the paulownia deck and hull skins.
The centre slice with squared off rails.
The slice 300 mm from the tail with squared of rails.
And the same for the slice 300 mm from the nose.
The next stage was to email the file to the guys at South Coast Foam at Burleigh Heads to cut the blank. They cleaned up the file in their machine version of Shaper3D, removing any lumps and bumps, and cut the board on their shaping machine using an EPS (Expanded PolyStyrene) blank. The blank is rated at VH (Very High/Hard) density and has a stringer pre-glued into it.
The view from the tail. Already finished.
The rails have a bit of a lip but are easily cleaned up with 80 grit sand paper.
The nose.
Home made sanding block with right angle guide and 80 grit paper hot glued to the block.
Using the sanding block to get a nice square edge.
The nose neatly finished with some light sanding.
The EPS blank weighs in at 2.2 kg. The original timber frame was 2.25 kg but I could have made it a bit lighter by using a 6 mm paulownia stringer and not using solid nose and tail blocks.
The blank tail was neatly finished and didn't need any additional sanding. The rail edge is square after some light sanding. No need to sand the deck and hull. These will be covered by paulownia.
Another photo showing the squared off rails after sanding.
Another photo showing the squared off rails after sanding.
Making the panels for the rail bands. I clamp and tape two 150 mm x 6 mm panels side by side. I remove the clamps, bend the panels at the tape join like an inverted "V" and glue the join/sides with polyurethane glue. I place a sheet of plastic over the panel to reduce mess. I place a sheet of 2400 mm x 1200 mm ply over the panel and weight it down with bricks, tool boxes and anything else heavy I can find. When the glue dries, the result is a 300 mm x 6 mm panel that I can clean up in my thicknesser. The polyurethane glue dries in a couple of hours.
Taping the top side.
Taping the bottom side.
Using clamps on my work bench to hold the panel in an inverted "V" position ready for gluing. Keeps both hands free to apply the glue.
Marine grade polyurethane glue. Fixit Mate FMP 200 glue. Hmmm, looks like honey tastes like...not honey.
The panels covered in plastic.
Then a sheet of ply over the top to apply and even pressure while the glue sets.
Special clamping bricks and bags for extra weight make for a nice flat panel.
After 2 hours the polyurethane glue is dry and the tape can be removed.
A nice clean join under the tape.
And the bottom side.
Thicknessing the panels down to 4 mm.
![paulownia wood surfboard paulownia wood surfboard]()
The panels thicknessed to 4 mm measured with my Dad's set of vernier calipers.
All sawdust and wood chips are recycled in my compost bin.
Marking the rail template on the back of an old vinyl sign that I cut and taped together.
The rail template ready to be cut out.
The first rail band marked out on the 4 mm timber panel using the template and cut out on my bandsaw. I finished the edges of the rail band with a block plane. A nice smooth edge minimizes the timber splitting when I steam and bend it around the nose of the board.
Steaming and bending the rail band around the nose of the board using wet hand towels and Mrs. Wood Buddha's hot iron. Normally this is a very effective way to bend paulownia and get me in trouble with Mrs. Wood Buddha. Even though the rail is only 4 mm thick, it didn't want to bend around the nose. Time for plan B.
Steaming the end of the rail in a pot of boiling water for 20 minutes. The pot has about 100 mm of water in the bottom.
![wood surfboard wood surfboard]()
After 20 minutes in the pot of boiling water the rail bends easily around the nose. I taped it in place for an hour.
The polyurethane glue applied to the edge of the foam blank.
The tail. No steaming required at this end and taped in place till the glue dries. This normally takes about 2 hours.
The rail at the nose taped in place as the glue dries.
After 2 hours the tape is removed and the rail is ready to
Planing down the top and bottom of the rail with my Kunz Beaver Tail Palm Plane.
The front of the rail trimmed to an angle.
The second rail steamed, bent and taped to the opposite side of the board.
The nose.
Polyurethane glue applied and the rail taped in place.
After 2 hours the tape is removed.
Ready for the palm plane.
The nose.
And the tail.
I take my time planing down the rails little by little until they are flush with the top and bottom contours of the board. I found this part pf the process a lot easier on the foam core board than with a timber frame.
The rail join at the nose. Before trimming.
And after trimming. I use a dovetail saw and sanding block.
The rail at the tail came loose.
![wood surfboard wood surfboard]()
I just cleaned off the old glue with sand paper, re-glued in it and taped it into place.
The rails all trimmed up on both sides.
The tail trimmed and sanded.
Marking the outline on the deck and hull skins. These skins are from my first attempt at this board using the timber frame. I just recycled them.
![wood surfboard wood surfboard]()
Marking around the nose.
Gluing on the tail piece.
The tail all trimmed up.
Sanding the deck and hull skins. My least favourite part of the board building process. One of these days I'll have to see if I can get a purchase request for a Drum Sander past the Minister for War and Finance (a.k.a. Mrs. Wood Buddha). I like to sand the skins before I glue them onto the board. It's much easier to sand them on a flat surface.
Applying the polyurethane glue to the bottom of the EPS core with a squeegee. A little glue goes a long way. I mist spray with water to help activate the glue. Polyurethane is moisture cured. Note the pencil line on the front of the core to mark the centre of the EPS core. This helps lining up the centre of the deck and hull skins with the EPS core.
And the same for the top of the core.
The skins lined up and taped in place.
The tail. I tape either side of the centre line Why? So I can make sure everything is centred Oh wise and noble reader. Things do tend to move around during the vacuum bagging process.
![wood surfboard wood surfboard]()
Then into the bag. I place timber blocks under the nose and tail of the board and tie down the centre of the board to the work bench. This is so the integrity of the board rocker is maintained during the vacuum bagging process. The pressure of the bag has a tendency to flatten out the board rocker. I then suck the bejesus out of the bag.
The view from the tail and the vacuum connector. There is a small piece of breather cloth under the connector to help with the flow of air out of the bag.
![wood surfboard wood surfboard]()
A padded timber block under the board nose.
Timber block under the tail.
The venturi vacuum pump set at a maximum of 25" Hg and minimum of 20" of Hg.
After 3 hours the board is removed from the bag.
The nose.
The tail.
![wood surfboard wood surfboard]()
Planing down the rails.
Sanding down the rails after planing.
View from the nose end.
View from the tail end.
Taping the top side.
Taping the bottom side.
Using clamps on my work bench to hold the panel in an inverted "V" position ready for gluing. Keeps both hands free to apply the glue.
Marine grade polyurethane glue. Fixit Mate FMP 200 glue. Hmmm, looks like honey tastes like...not honey.
The panels covered in plastic.
Then a sheet of ply over the top to apply and even pressure while the glue sets.
Special clamping bricks and bags for extra weight make for a nice flat panel.
After 2 hours the polyurethane glue is dry and the tape can be removed.
A nice clean join under the tape.
And the bottom side.
Thicknessing the panels down to 4 mm.
The panels thicknessed to 4 mm measured with my Dad's set of vernier calipers.
All sawdust and wood chips are recycled in my compost bin.
Marking the rail template on the back of an old vinyl sign that I cut and taped together.
The rail template ready to be cut out.
The first rail band marked out on the 4 mm timber panel using the template and cut out on my bandsaw. I finished the edges of the rail band with a block plane. A nice smooth edge minimizes the timber splitting when I steam and bend it around the nose of the board.
Steaming and bending the rail band around the nose of the board using wet hand towels and Mrs. Wood Buddha's hot iron. Normally this is a very effective way to bend paulownia and get me in trouble with Mrs. Wood Buddha. Even though the rail is only 4 mm thick, it didn't want to bend around the nose. Time for plan B.
Steaming the end of the rail in a pot of boiling water for 20 minutes. The pot has about 100 mm of water in the bottom.
After 20 minutes in the pot of boiling water the rail bends easily around the nose. I taped it in place for an hour.
The polyurethane glue applied to the edge of the foam blank.
The tail. No steaming required at this end and taped in place till the glue dries. This normally takes about 2 hours.
The rail at the nose taped in place as the glue dries.
be planed down to the top and bottom contours of the board.
Planing down the top and bottom of the rail with my Kunz Beaver Tail Palm Plane.
The front of the rail trimmed to an angle.
The second rail steamed, bent and taped to the opposite side of the board.
The nose.
Polyurethane glue applied and the rail taped in place.
After 2 hours the tape is removed.
Ready for the palm plane.
The nose.
And the tail.
I take my time planing down the rails little by little until they are flush with the top and bottom contours of the board. I found this part pf the process a lot easier on the foam core board than with a timber frame.
The rail join at the nose. Before trimming.
And after trimming. I use a dovetail saw and sanding block.
The rail at the tail came loose.
I just cleaned off the old glue with sand paper, re-glued in it and taped it into place.
The rails all trimmed up on both sides.
Marking the outline on the deck and hull skins. These skins are from my first attempt at this board using the timber frame. I just recycled them.
Marking around the nose.
Gluing on the tail piece.
The tail all trimmed up.
Sanding the deck and hull skins. My least favourite part of the board building process. One of these days I'll have to see if I can get a purchase request for a Drum Sander past the Minister for War and Finance (a.k.a. Mrs. Wood Buddha). I like to sand the skins before I glue them onto the board. It's much easier to sand them on a flat surface.
Applying the polyurethane glue to the bottom of the EPS core with a squeegee. A little glue goes a long way. I mist spray with water to help activate the glue. Polyurethane is moisture cured. Note the pencil line on the front of the core to mark the centre of the EPS core. This helps lining up the centre of the deck and hull skins with the EPS core.
And the same for the top of the core.
The skins lined up and taped in place.
The tail. I tape either side of the centre line Why? So I can make sure everything is centred Oh wise and noble reader. Things do tend to move around during the vacuum bagging process.
Then into the bag. I place timber blocks under the nose and tail of the board and tie down the centre of the board to the work bench. This is so the integrity of the board rocker is maintained during the vacuum bagging process. The pressure of the bag has a tendency to flatten out the board rocker. I then suck the bejesus out of the bag.
The view from the tail and the vacuum connector. There is a small piece of breather cloth under the connector to help with the flow of air out of the bag.
The tie down strap.
A padded timber block under the board nose.
Timber block under the tail.
The venturi vacuum pump set at a maximum of 25" Hg and minimum of 20" of Hg.
After 3 hours the board is removed from the bag.
The nose.
The tail.
The bag pulls a nice concave.
Trimming the sides of the skins. I take my time with this part of the process and use a nice sharp plane and a sanding block.
Planing down the rails.
Sanding down the rails after planing.
View from the nose end.
View from the tail end.
Ready for the rail bands, centre fin block, side fin plugs, leash plug, rail shaping, final sanding and epoxy hot coat or lanolin. I'll cover this off in Part 2.
↧
Making Wooden Surfboard Fins
Namaste and welcome to this installment of how to make a wooden surfboard fin. This is another iteration in a long line of attempts at making wooden fins from solid pieces of timber. The previous attempt as seen below wasn't too successful. With the the previous version, the fin lug that holds the screw and fixes the fin to the fin box snapped off.
Now my story (and I usually tell this after my umteenth beer) is that I hit a huge, gnarly, partially submerged bomby, pulling a death defying late takeoff on an insanely huge and hollow reef break which by the way I just made by gripping to the rail of my board with white knuckles and my sphincter snapping. My board flexed almost to the point of breaking, while I powered my way through the bottom turn, got shacked and then spat out like an old piece of chewy. Not likely. At this point, Mrs. Wood Buddha normally rolls her eyes in disgust.
My second theory is that the point at which the lug snapped was a weak point due to the way the grain of the timber runs through the fin and that I never really hit a submerged bomby. BORING!!! Hence the old saying; you should never let the truth get in the way of a good story...or a bad one for that matter.
Anyway, my fin building process is as follows. Not many words which is unusual for me, so I'll let the pictures do the talking.
Enjoy.
The broken fin lug on version 1.0
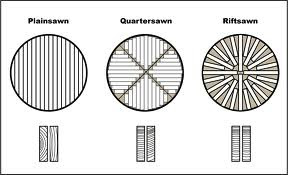 |
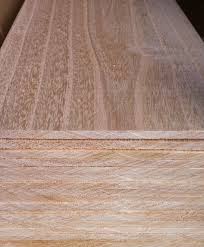
| I used camphor laurel timber for the fins cut from seasoned logs. I rift the timbers on my bandsaw. This ensures that the grain is running perpendicular to the board and minimises warping in the fin. |
| Cutting the fin plan shape on my bandsaw. |
Cutting a mortise into the base lug of the fin.
The base of the fin showing the mortise which is 5 mm thick.
Getting ready to glue the 2 mm strips to either side of the mortise. The 5 mm mortise plus 2 x 2 mm side strips = 9 mm which is the inside width measurement of a fin box.
Using thickened epoxy resin to glue the side strips on. The side strips have their grain running from leading edge to trailing edge of the fin which makes for a super strong fin lug and hopefully no more breakages.
All held in place with some spring clamps while the epoxy dries.
This is a paulownia version of the same fin.
Trimming the base of the fin on my bench sander.
All trimmed up and ready for shaping.
Some custom made shaping tools with 80 grit cloth backed sand paper.
This shaping tool is used to shape the leading edge of the fin. It has a NACA0012 leading edge foil profile and ensures a reasonably accurate foil.
This is the trailing edge shaping tool.
More to come.
↧
↧
A Velcro Surfboard Sanding Block for $15
Namaste Wiley Wood Wittlers. I was looking around recently for a velcro sanding block and was a bit surprised to find that they could set you back as much as $25 a piece and $4 each for the sanding sheets. Now at times I have been accused of being as tight as a frog's bung hole and I'm sure these things are good quality and worth every penny but I like a challenge and set out to see if I could find a cheaper alternative from readily available items. So I set off to the big green shed (Bunnings).
This is what I came back with. 178 mm adhesive velcro conversion kit ($10) and assorted packs of 5 sanding disks ($10 each) from Bunnings.
20 mm thick piece of foam rubber (200 mm x 200 mm) from Clark Rubber ($5).
Stick the velcro pad to the rubber piece. Be careful when sticking the velcro to the foam and work from one edge so you don't get any bubbles under the velcro.
Cut around the velcro pad with a sharp craft knife.
↧
Designing Hollow Wooden Surfboard Templates
Namaste Mouse Fondlers and welcome to this installment of "Designing Hollow Wooden Surfboard Templates" using AKU Shaper and Hollow Board Template Maker software. Now there may some old school wooden surfboard board building tradey types out there who may not be too fond of this newfangled computer technology stuff and right now you are cringing at the thought of mind wrestling with your PC or laptop. I can understand that, having come from a long line of tradesmen myself. After all, my Dad, Mr. Wood Buddha Senior, rest his soul, was an old school tradey with thick sausage fingers and calloused hands the size of dinner plates that could crush an elephant's testicles. He never really understood what all the fuss over computers was about. But I have to say that having designed a wooden surfboard the old fashioned way using paper, pencils and rulers and also using computer aided design software like AKU Shaper, that there are some definite benefits to computer design. It is accurate, it is fast (once you get some practice) and the template files can be printed and shared easily with other wooden surfboard builders from all over the world. The templates can also be converted into other formats such as DXF and DWG files that can be used with CNC machines to provide automated cutting of the templates.
I think that part of the problem with learning how to use some new software is that sometimes the user documentation is often a little light on and doesn't always include tutorials on how to use the software in real life situations. I'm always up for a challenge so I thought I would put together a "Quick Start" tutorial with a slant on hollow wooden surfboard template design. So here goes.
Now, before you jump down my throat to give me a reverse ass-hole-ectomy regarding my "documentation is a little light on" comment, I would just like to say that this is a generalisation and not in any way directed at the wonderful folks at AKU Shaper and the designer of HBTM who have very generously provided us with free versions of their software with help support built in. If you do like these pieces of software and want to show your appreciation, you can always buy the paid version of AKU Shaper or make a donation to JedAil the developer of HBTM.
Another point I wanted to make was that I am not the guru subject matter expert on AKU Shaper. There are probably more capable drivers of this software than me. But I have spent an inordinate amount of time using this software from the perspective of a part-time, underpaid wooden surfboard builder. My motivation is to try and cut down the learning curve for others and make the learning process a little easier.
So without further adieu, let's get cracking shall we.
So by now you've probably gathered that we will be using two software programs to do this design, AKU Shaper 1.18.000 and Hollow Board Template Maker (HBTM) 2.0.10. We'll start with AKU Shaper.
Note: As of April/May 2014 the Java version of AKU Shaper (1.18.000) is no longer working due to a server and security issue. You will need to use the latest licensed version of AKU Shaper.
Jimmy Freese from AKU Shaper writes:
Yes we are having an issue with our .jnlp version of the software related to server and security. We're working to fix that. Java/Oracle has made things difficult as that is an older version with a lot of older libraries.
Feel free to download the latest Version of AKU at
Firstly, we need to find a picture of a board plan shape and profile (rocker) that we like. We could photograph a board or find a picture on the Web. For the purposes of this tutorial I've used Google images and found an image of a rounded pin tail that I like. I've saved the board image to my laptop and then edited it in Microsoft Paint to make sure that the nose of the board is pointing to the right hand side of the computer screen. This will be the board image which we will base our design on. Here’s one I prepared earlier. I had to flip the board 90 degrees to line up the nose and tail with the board direction in AKU.
Next, we'll fire up AKU Shaper. This may take a few minutes so please be patient.
You should end up with a screen like this.
Now at this point I will mention that we will be using the free Java version of AKU Shaper 1.18.000. The software is also available for purchase as a Windows, Apple or Linux compatible application. The paid version of AKU Shaper is the latest release and has extra features. The Java version of AKU Shaper does not run well under newer versions of the Java Runtime Environment.
This is from the AKU Shaper website. "A number of recent java updates have done their best to destroy this release. We have put a lot of time into AKU Shaper 2.0 addressing the issues and adding a number of improvements. We will keep this version running as long as possible but we are now longer actively supporting it. If you're running into problems try downgrading to Java version 6".
Older versions of Java SE Runtime Environment are available on the Oracle archive. Be aware that older versions do not have recent security updates.
I am also running Windows 7 on my laptop.
Before we get back into the tutorial, I wanted to mention that AKU does have a help option that has some good reference information. There are also some tutorials to get you started as well. Click on the "Help" menu option and then "Help" again. There is also a reference card in the categories.
Before we get back into the tutorial, I wanted to mention that AKU does have a help option that has some good reference information. There are also some tutorials to get you started as well. Click on the "Help" menu option and then "Help" again. There is also a reference card in the categories.
The Help menu.
Click [File – New – 7’6” generic Shortboard] in the drop down box and click OK. The board size template that is chosen will depend on what size board is required. We'll select the size that is closest to the final size of board, about 8'. Remember we can always change the board size at any time while we are designing in AKU.
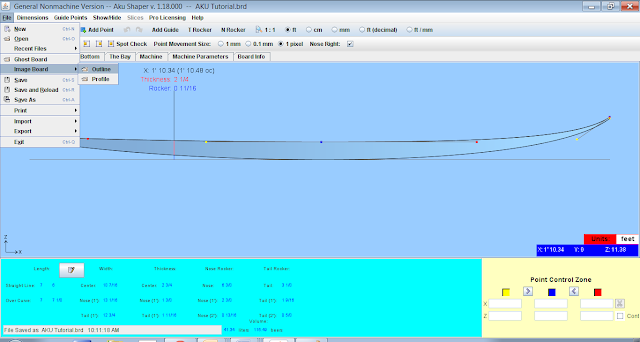
Click [File – Image Board – Outline], we choose the directory where we saved our board plan and profile image. We select the plan image and click OK.
The dialogue box for aligning the image board.
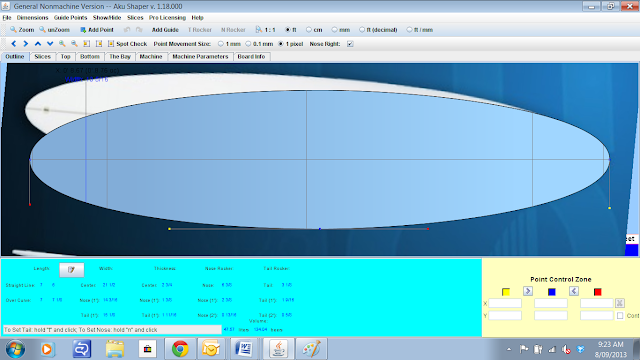
To line up the image board, we hold down the “n” key on our keyboard, hold our mouse pointer over the tip of the board nose on the image and left click our mouse. For the tail, we hold down the “t” key of our keyboard, hold our mouse pointer over the tail of the board on the image and left click our mouse.
The nose aligned.
The tail aligned. The image is hiding behind the board outline.
Designing the Outline
The next step of the process is to adjust the board outline. We'll do this by moving the bezier points (blue dots) which are located on the board outline. Bezier points can be added to the bottom curve of the plan shape to get it match the shape of the image board. Existing bezier points can also be moved.
To move an existing point, we hover the mouse pointer over it, hold down the left mouse button, and move the point to where we want it. We release the mouse button to release the point when we’re happy with its position. We can also click on the bezier point and use our arrow keys to move it around.
We can add Bezier points by clicking on the “Add Point” button on the menu bar, hovering our mouse point over the section of the bottom board line where we want to position the point and clicking the left mouse button.
We can change the angle of the board outline by moving the red and yellow tangent points associated with the blue Bezier point.
Play around and and don't be afraid to make mistakes. It’s a great way to learn. You can always use the "Undo last curve change" keys (curved arrows) on the menu bar to undo any changes you've made.
Tip: Use the minimal number of Bezier points to adjust the outline of your board. This will give gentle flowing curves and minimise any lumps and bumps.
The outline adjusted. An extra bezier point has been added towards the nose of the surfboard.
To hide the image board, we click on [Show/Hide] on the menu bar, and uncheck the "Show Image Board" button.
To avoid the disappointment of losing your work, always remember to save your design regularly!
Next we highlight the original bezier point at the top of the tail. Notice that the yellow and red tangent points aren't in a straight line. Looking at the point control zone in the lower right hand corner, there is a check box there called "Cont". If this box is checked then the the red, yellow and blue points of the bezier are all in a continuous straight line. This bezier end point at the tail normally has "Cont" unchecked. We check this box and move the red tangent point so that all three points are in a straight vertical line. We can highlight the blue point and use our down arrow key to move it down the tail of the profile.
Now that we've completed the outline and profile design and we can now start working on the rails through the slices view.
Next we'll add a slice to that same position. Click [Slices - Add a New Slice] in the menu bar. An "Add a Slice" window should appear. Type 400 in the "Type X-coordinate?" box and press OK. A new slice will be added at 400 mm from the tail.
Using the bezier and tangent points, adjust the outline of the added slice with the intermediate slice outline (white outline) until they both match. You may not be able to get it perfectly aligned but try to get it as close as possible. Use the "Zoom" button to view the slice lines close up.
We repeat this process until we have added slices at 200 mm intervals for the entire length of the board. We also add additional slices at 100 mm from the tail and nose as well. Now we delete the original 5 slices located at the board centre, 300 mm from the nose and the tail and right near the nose and the tail. We do this by highlighting each of these slice lines on the board outline (one at a time) and clicking the [Slices - Delete Current Slice] menu option.
To avoid the disappointment of losing your work, always remember to save your design regularly!
Designing the Profile
Let's design the profile next. There are two elements to this, a top curve and a bottom curve. To adjust the top of the profile we click on the "Top" tab.
To load the image of our board profile, we click [File – Image Board – Profile], choose the directory where we saved our board image file. We select the image and click OK. See the screens below.
Loading the profile image.
Choosing the image file.
The nose and tail alignment dialogue box. Click OK.
The profile image loaded.
Aligning the nose. We hold down the “n” key on our keyboard, hold our mouse pointer over the tip of the board nose on the image and left click our mouse.
And the tail. We hold down the “t” key on our keyboard, hold our mouse pointer over the tail of the board on the image and left click our mouse. The nose and tail alignments can also be changed on the bottom profile. We click on the "Bottom" tab and follow the same process in that view. We can now make adjustments to the blue bezier points to match the surfboard profile with that of our board image. We can add more bezier points if required.
Tip: Try to align the bottom profile of your board image with the white horizontal guide line on the screen.
Tip: Use the "Zoom" menu tab button for detailed adjustments at the nose and the tail. "Unzoom" reverts back to the original view. When in the "Zoom" view, the board can be moved around the screen using the keyboard arrow keys. Click on the "Zoom" button in the menu bar and draw a viewing rectangle by holding the right mouse key and dragging the mouse pointer.
The top and bottom profiles have been lined up reasonably close to the board image. There's still some fine adjustments needed on the nose and tail detail. We'll do those now.
Starting with the Top profile at the tail we round that off with a slight radius. You'll notice that I've hidden the background image board so that it's easier to see our board.
First we add a bezier point to the top profile line near the tail. We do this in the "Top" profile view with the design "unZoomed". If we try to add a bezier point while the view is "Zoomed" AKU doesn't seem to like it. I think the mouse pointer needs to be located exactly over the profile line.
Next we highlight the original bezier point at the top of the tail. Notice that the yellow and red tangent points aren't in a straight line. Looking at the point control zone in the lower right hand corner, there is a check box there called "Cont". If this box is checked then the the red, yellow and blue points of the bezier are all in a continuous straight line. This bezier end point at the tail normally has "Cont" unchecked. We check this box and move the red tangent point so that all three points are in a straight vertical line. We can highlight the blue point and use our down arrow key to move it down the tail of the profile.
We end up with a radius curve like in the picture above. The tangent points can be adjusted to fine tune the curve.
Now we do the same with the nose of the surfboard. We "unZoom" the view and add a new bezier point near the nose by clicking on the "Add Point" button in the menu, and positioning our mouse over the top profile line near the nose. We make sure that the point we've added is reasonably close to the nose of the board. This is where the radius of the curve will start.
Next we highlight the original bezier point at the top of the nose and check the "Cont" box in the point control zone in the lower right hand side of the screen.
We move the yellow or red tangent point so that all three points are in a straight vertical line.
Then we highlight the blue point and use our down arrow key to move it down the nose of the profile to create a curve.
Now we'll work on the nose and tail of the bottom profile.
We click on the "Bottom" tab to work on the bottom profile and "Zoom" in on the surfboard nose. We add a new bezier point near the surfboard nose on the bottom profile line and highlight the original blue point on the bottom profile line at the nose.
Looking at the point control zone you'll notice that this blue bezier point doesn't have a red tangent point. There is only a yellow tangent point so there's no need to check or uncheck the "Cont" box. The behaviour of this bezier point is the same regardless.
We move the yellow tangent point to create a vertical line with the blue point.
And move the highlighted blue bezier point up using the up arrow key to create a radius curve.
We'll leave the bottom of our surfboard tail without a radius and keep this edge sharp. This is fairly common in surfboard designs and allows for quick release of water at the tail.
We can also change the nose and tail rocker by clicking on the "N Rocker" and "T Rocker" options in the menu bar, clicking your mouse pointer in the design section of the screen and use the up and down arrow keys to raise or lower the nose and tail.
Designing the Rails and Slices
Now that we've completed the outline and profile design and we can now start working on the rails through the slices view.
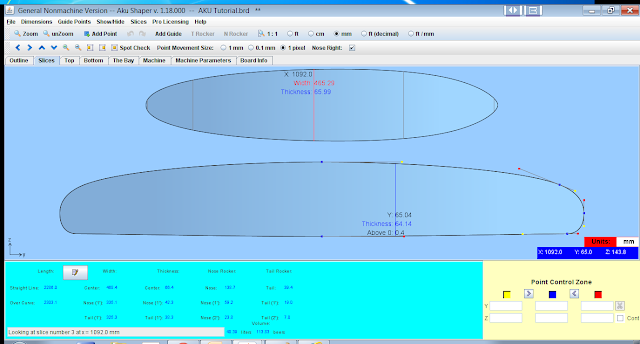
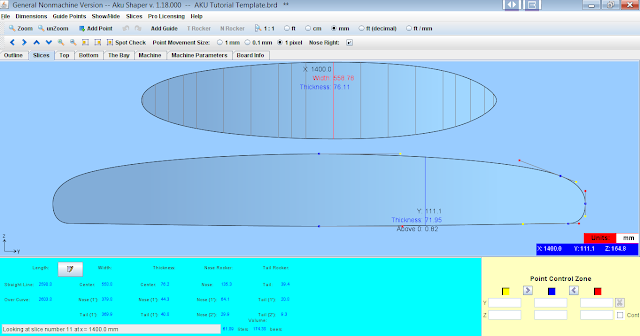
Click on the Slices tab. To highlight the slice we want to work on, we click on the slice line on the board outline, above the slice image. The slice line will change colour to red and the slice image will appear in the lower section of the window. In the picture above, we are looking at the centre slice. By default, AKU Shaper will place slices at the centre of the board, 300 mm from the tail and the nose and roughly 50 mm from the tail and the nose. We can make adjustments to a slice by moving blue bezier points and changing the position and length of the red and yellow tangent points. We can also add new bezier points as well. It's best to use the least number of bezier points as this will give smoother lines.
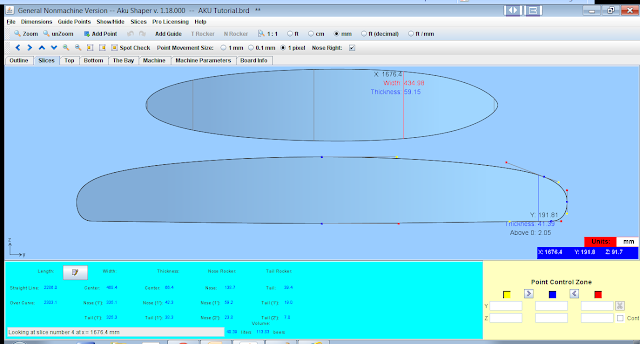
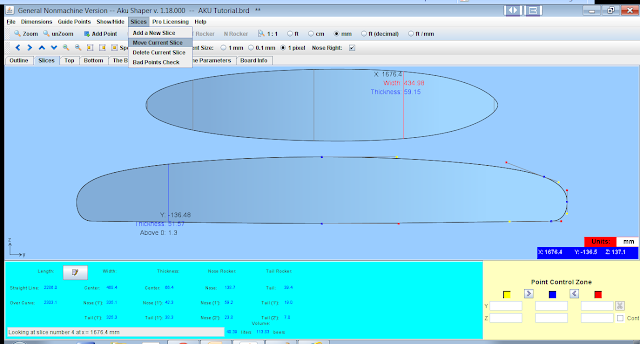
To move a slice, highlight the slice line on the board outline. In this case we highlight the slice at 1676.4 mm from the surfboard tail. The slice line changes colour to red.
Click [Slices – Move Current Slice] in the drop down box.
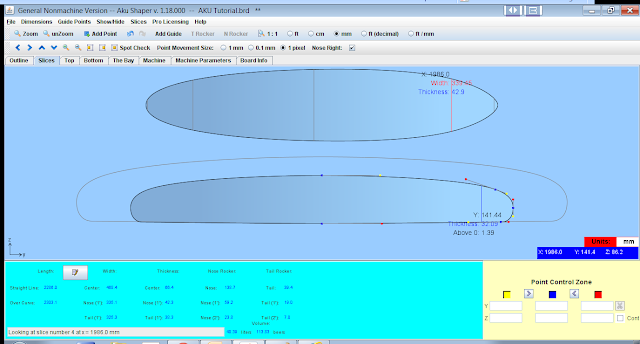
A dialogue box will appear. We enter the new position for the slice and click OK. The slice will move to the new position. In this case we will move the slice 300 mm from the nose which is the board length 2286 mm - 300 mm = 1986 mm.
The new slice at 300 mm from the nose.
Some other things we can do in "Slice" view.
Adding a new slice - Click on [Slice - Add a New Slice] and enter the position of the new slice from the tail of the surfboard.
Deleting a slice - Highlight the slice we want to delete. Click on [Slice - Delete Current Slice] and the current slice will be deleted. Be careful using this as no warning dialogue box appears.
To view the intermediate slices between the main slices, hold down the shift key and move the mouse over the surfboard outline. We do this in the Slice view. The intermediate slices will appear as white outlines.
Adjusting Surfboard Dimensions
We're on the home straight. We've designed our board outline, rocker and slices and now all that's left is to fine tune the measurements. One of the key surfboard measurements we can change indirectly is the board volume. We do this by changing the length, width and thickness of the board. If we look at the very bottom centre of the AKU screen, we can see the board volume is measured in litres or beers. Personally I find the metric system confusing so it's all about the beers for me.
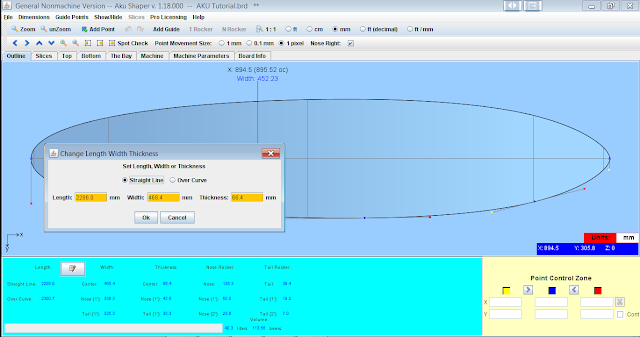
We can click on the "Change the Length and Width" button at the bottom left hand side of the window. The "Change Length Width Thickness" dialogue box will appear. In this case the measurements are in metric units. The measurements can be changed to imperial units by clicking the "ft" measurement radio button in the menu bar.
Changing the surfboard length, width and thickness.
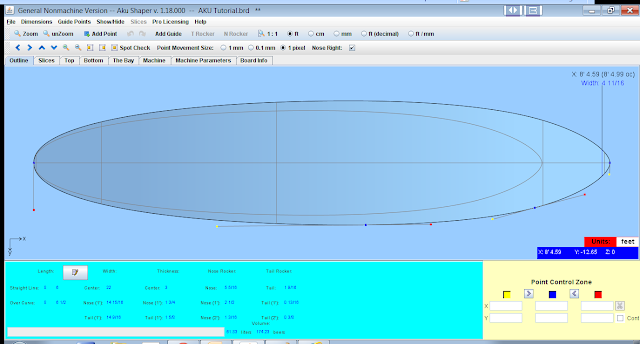
In the picture above, we've changed the measurements to "ft" imperial. The length has been changed to 8'6', the width to 22" and the thickness to 3". This has changed the volume to almost 62 litres. The screen shows the original board outline and the new board outline for comparison. When designing a surfboard in AKU Shaper I will often toggle between imperial and metric units. I understand the length, width and thickness in imperial measurements better, however when I am working on slice placement I prefer metric. I struggle with fractions sometimes.
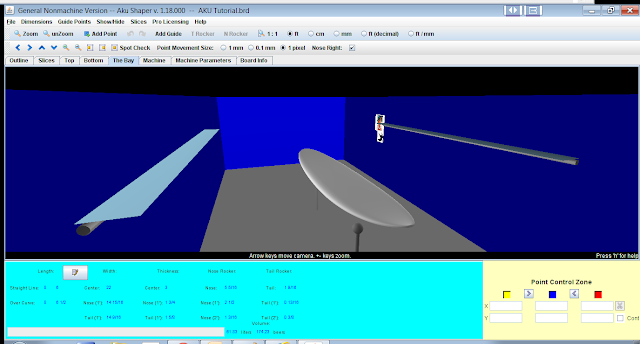
We can view the board in 3D by clicking on the "The Bay" tab. There are lots of shortcut keys that can change the way the board appears in this view.
To change the angle of our view in 3D mode, we use our arrow keys. We can also use our mouse for this by holding down the left mouse button and moving the mouse pointer around the bay. The mouse wheel zooms the screen in and out.
Pressing the "v" key toggles the board views between solid, sliced, wired and curves. The "f" flips the board over and the spacebar toggles the curves on and off.
Press "h" for other help options like the various board modes.
Making Templates
Now let's get to the nitty gritty and start on the templates. If we were to use this board file with HBTM we'd end up with a template that only has 5 slices or ribs. Not ideal. What we want is a template that has slices spread out at even intervals over the board length. The distance between slices is a personal choice. I like to use 200 mm for long boards and 150 mm for shorter boards. Some wooden board builders go even shorter at 100 mm. For this tutorial we'll use 200 mm as the distance between slices and we'll add an two additional slices 100 mm from the nose and the tail.
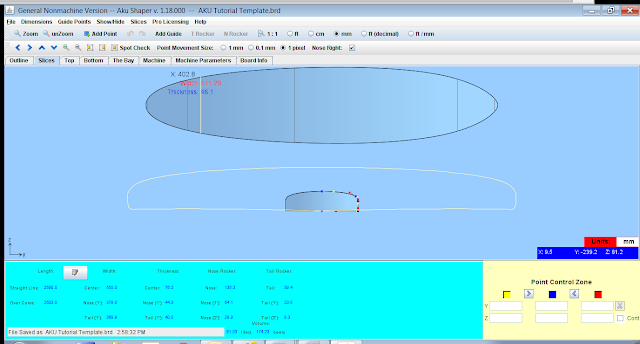
First we'll save our board with a new file name and use this for adding the additional slices and making the templates. Let's call it "AKU Tutorial Template.brd". That way, if we make a pig's breakfast of it we can always reload our original board file.
When AKU Shaper adds a slice, the new slice added, takes its attributes including rail shape from the nearest adjacent slice. What does this mean? If we add a slice without adjusting its shape, the result will be a surfboard design where the flow of the curve length ways does not match our original 5 slice design. In other words the flow will have lumps and bumps. To maintain a continuous flow of the board shape from nose to tail we need to be thoughtful about how we add slices and it does involve some adjustment of the added slices. So how do we do this? We use a feature called intermediate slice view and use this as a guide to adjust our added slices. The intermediate slice view (hold down the "Shift" Key and the left mouse button and drag your mouse across the board outline from tail to nose in "Slices" design mode) shows us what the slice should really look like at any point on the board. The "real" slice shape appears as a white slice outline around the slice view at the bottom of the design pane. We will use this intermediate slice outline as a guide to adjust our new added slices.
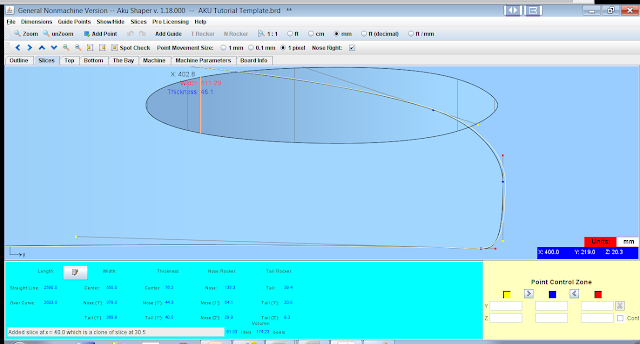
Click on the "Slices" tab to get into slice design mode. Click on the "mm" radio button in the menu tab. So let's add a slice at 400 mm from the tail. Firstly, we hold down our "Shift" Key and the left mouse button and drag our mouse across the board outline from tail to nose until the location or X-coordinate value is 400 mm. Release the left mouse button. Don't worry too much if it's not exactly 400 mm. Plus or minus a millimetre or two is okay.
Next we'll add a slice to that same position. Click [Slices - Add a New Slice] in the menu bar. An "Add a Slice" window should appear. Type 400 in the "Type X-coordinate?" box and press OK. A new slice will be added at 400 mm from the tail.
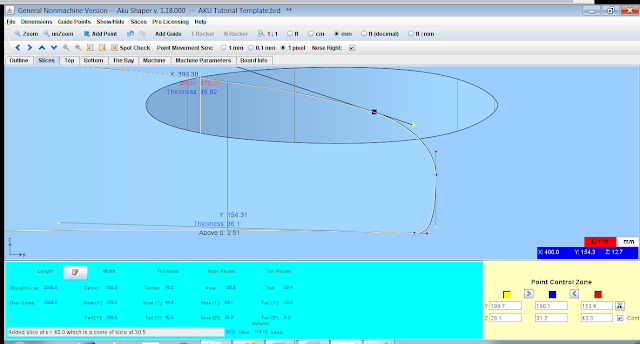
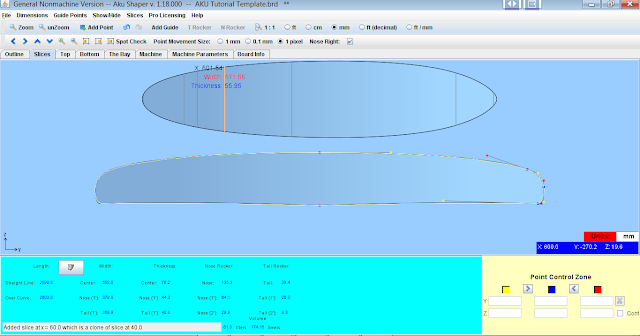
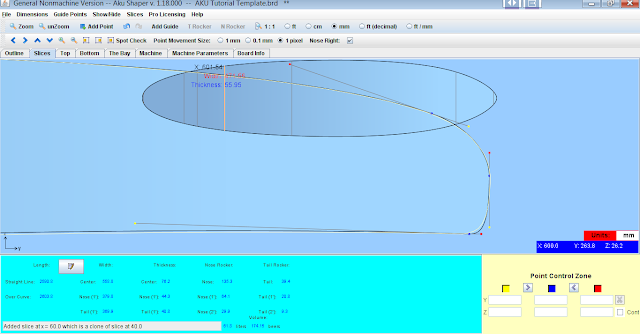
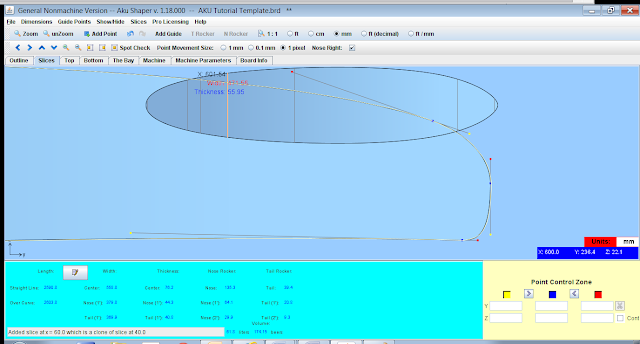
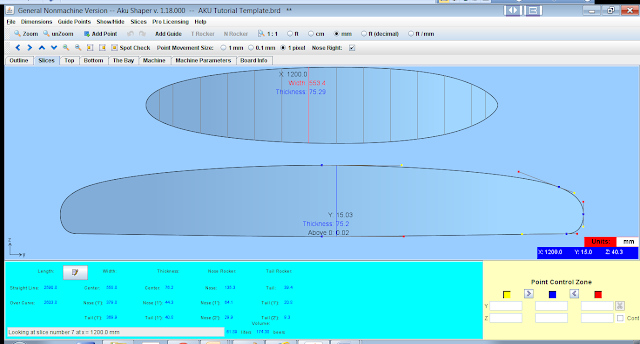
Using the bezier and tangent points, adjust the outline of the added slice with the intermediate slice outline (white outline) until they both match. You may not be able to get it perfectly aligned but try to get it as close as possible. Use the "Zoom" button to view the slice lines close up.
In the picture above, the bezier point at the top of the slice line is highlighted and moved to adjust this section of the slice. Once we are happy with the slice shape we can add the next slice at 600 mm.
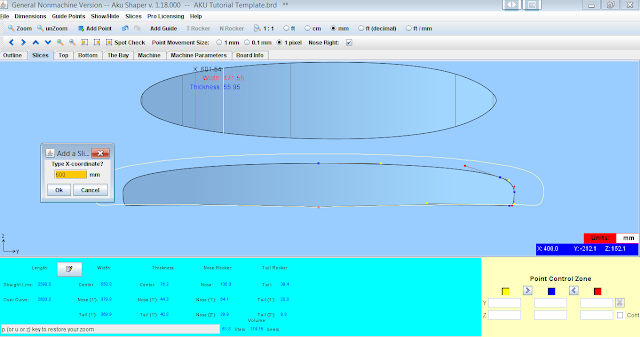
We'll hold down our "Shift" Key again and the left mouse button and drag our mouse across the board outline from tail to nose until the location or X-coordinate value is 600 mm. We release the left mouse button. Don't worry too much if it's not exactly 600 mm. Plus or minus a millimetre is okay.
Click [Slices - Add a New Slice] in the menu bar. An "Add a Slice" window should appear. Type 600 in the "Type X-coordinate?" box and press OK. A new slice will be added at 600 mm from the tail.
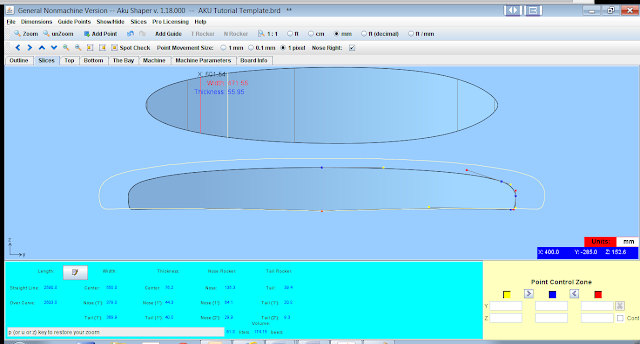
A new slice is added at 600 mm and appears in the slice design pane.
Using the bezier and tangent points, we adjust the outline of the added slice with the intermediate slice outline (white outline) until they both match. The picture above shows the slice before adjustment.
The slice after adjustment.
The final design should look like the picture above with slices positioned every 200 mm and two additional slices 100 mm from the tail and the nose.
Now fire up HBTM at the following link http://jedail.free.fr/programs/HBTM.jnlp. This may take a few minutes.
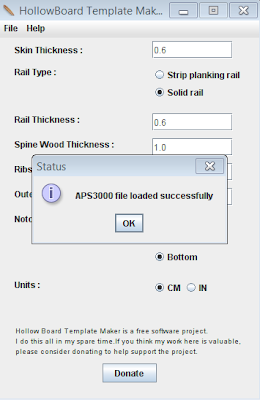
We click [File - Open] and select our BRD file which is called "AKU Tutorial Template.brd". Click "Open" and the file will be loaded when the "APS3000 file loaded successfully" dialogue box appears. Click OK.
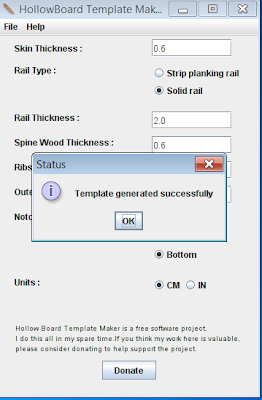
Now we can alter the template variables to suit the style of surfboard we are going to build. In this case, skin thickness is 6 mm (0.6 cm), the rail type is solid, the rail thickness is 20 mm (2.0 cm) and this will exclude the first rail band or outer frame rail band, spine thickness is 6 mm (0.6 cm), rib thickness is 6 mm (0.6 cm) and the outer frame thickness is 5 mm (0.5 cm). We'll leave the notch position set as "Bottom".
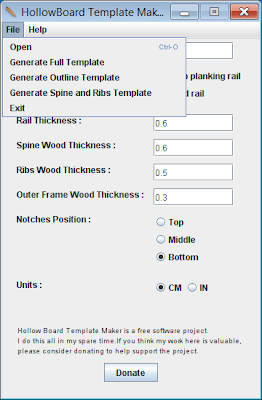
Click [File - Generate Full Template].
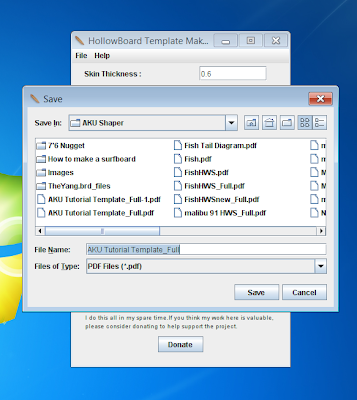
HBTM will ask you to save the template file to a directory. Click Save.
The template is generated successfully. Click OK.
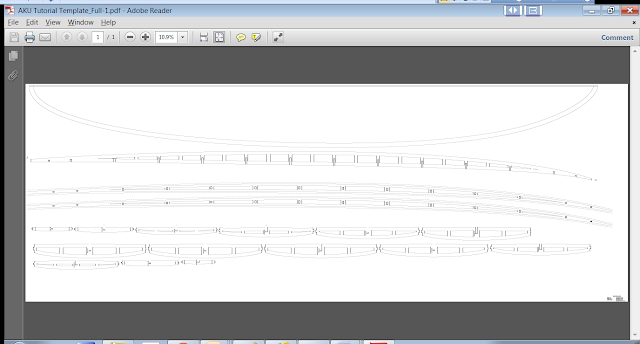
To view the template, go to the directory where the template was saved and double click on the PDF file in this case "AKU Tutorial Template_Full.pdf". If you have Adobe Reader or some other PDF viewer the file will open and you will be able to view and print it.
The template generated and ready for printing.
If you are wanting to produce templates for the bead and cove rail method, make sure the Rail Type - Strip Planking Rail radio button is checked. The slices in the template will have rounded ends instead of squared ends.
If you have any questions, feedback or improvements just drop me an email at woodbuddha1@gmail.com
↧
Build Surfboard Shaping Stands for under $90
Namaste Shonky Shapers and welcome to this installment of building a set of surfboard shaping stands for under $90. A good set of shaping stands are a must when you're building any kind of surfboard but they can be expensive and they can set you back as much as $350 - $400. Most of the stands on the market are of the welded steel type and are pretty schmick but the price tag can be a bit of a deterrent.
"So why not make a set, Wood Buddha?" I thought to myself.
What an excellent idea!
Now I can't weld my way out of a wet paper bag so I decided to look at using wood as a material instead of steel. Ply is cheap, strong and easy to work with so that's what I ended up going with. The other requirement was that I wanted the stands to pack away easily when I wasn't using them so they had to be easily disassembled.
So the result was a set of stands that are easy to build, relatively inexpensive, can be disassembled when not being used and very sexy. I bet you didn't think it was possible to build a set of stands that look this sexy for so little coin. I mean, take a look at them. Aren't they the duck's plums? The Jennifer Hawkins of shaping stands? I think so, but then again I've been spending a little too much time in the shed lately. I really need to get out.
"So how do you do it for so little money Wood Buddha?" I hear you asking. Easy Peesy Japaneesy. Read on Oh wise and noble reader.
By the way, the cost can work out even cheaper because one sheet of ply will actually make two sets of stands. So if you go halves with a mate you can save some more dosh. Alternatively you could build yourself one set of stands for shaping and a second taller set for glassing.
Firstly, let's run through the material list. You'll need
1 x 1200 mm x 2400 mm x 17 mm sheet of CD ply ($65). CD ply is used in the construction industry for flooring. It is strong and waterproof.
2 x pool noodles ($6)
1 x tube of Selley's Shoe Glue ($6)
20 x 50 mm x 8 gauge screws
4 x 12 mm x 50 mm bolt and wing nuts ($10)
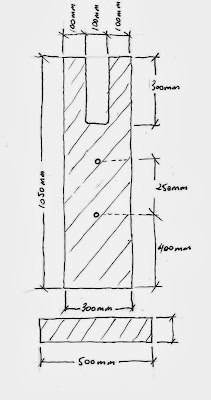
I've drawn up some very rough plans of the stand ends and the middle brace with some measurements. You can adjust the measurements to suit your height and the type of boards you would typically shape. I'm a tall bloke and I mainly build long boards so the measurements suit me fine. The height of 1050 mm is good for my height and the middle brace length of 1200 mm is good for shaping long boards. If you're not sure, build the stands as per the measurements below, screw the stands together without gluing up the pieces and give them a try. You can always unscrew the pieces, cut them shorter, and then screw and glue it once you're happy with the height and length of the stands.
The shaping stand ends. You'll need two of these.
The middle brace. You'll need one of these to join the ends together.
Firstly, let's start with the CD ply. I buy this from Bunnings where they also have a cutting service. It usually costs a couple of bucks to get the ply sheet cut but I've found that if the cuts are simple and I'm nice to the bloke operating the machine I usually won't get charged for the cutting. I got the sheet cut for two sets of stands.
The Stand Ends
4 x 1050 mm x 300 mm
4 x 500 mm x 100 mm
The Stand Middle Braces
2 x 1200 mm x 200 mm
2 x 1200 mm x 100 mm
4 x 300 mm x 100 mm
I get the sheet cut length ways to minimise waste.
2 x 300 mm wide x 2400 mm long
1 x 200 mm wide x 2400 mm long
3 x 100 mm wide x 2400 mm long
Getting the CD ply cut on the machine.
12 mm bolts and wing nuts. The wing nuts were lying around in my shed. A gift from Mr. Wood Buddha Senior who was a Fitter and Turner.
8 gauge phillips head screws.
Selleys Shoe Glue for gluing the pool noodles. This stuff can stick teflon to ice.
![]()
A pool noodle form Crazy Clarks. Used for padding.
The stand end with board slot cut out using a jigsaw or bandsaw. The bottom corners of the slot are rounded using a holesaw or Forstener bit. I also chamfer the top corners.
The base is fixed to the stand end using three 8 gauge screws.
The middle brace fixed together using 8 gauge screws. 13 mm holes are drilled in the end plates for the 12 mm bolts which fix the middle brace to the stand ends.
Another view of the middle brace showing the top plate.
8 gauge screws fixing the top plate to the middle brace.
The stand assembled.
12 mm bolts and wing nuts. The wing nuts were lying around in my shed. A gift from Mr. Wood Buddha Senior who was a Fitter and Turner.
8 gauge phillips head screws.
Selleys Shoe Glue for gluing the pool noodles. This stuff can stick teflon to ice.
A pool noodle form Crazy Clarks. Used for padding.
The stand end with board slot cut out using a jigsaw or bandsaw. The bottom corners of the slot are rounded using a holesaw or Forstener bit. I also chamfer the top corners.
The base is fixed to the stand end using three 8 gauge screws.
The middle brace fixed together using 8 gauge screws. 13 mm holes are drilled in the end plates for the 12 mm bolts which fix the middle brace to the stand ends.
Another view of the middle brace showing the top plate.
8 gauge screws fixing the top plate to the middle brace.
The stand assembled.
Side view with the pool noodle padding. I use the Shoe Glue to glue the pool noodle foam together. I cut the foam down one side length ways and slide it into the slot.
A view of the middle brace connected to the end.
A close up of the middle brace end plate bolted to the stand end.
Finished and ready to go. A coat of varnish and it'll be as flash as a rat with a gold tooth.
One in the slot.
...and one on the top.
↧
The Surfrider Eco Challenge - Wooden Surfboard Event
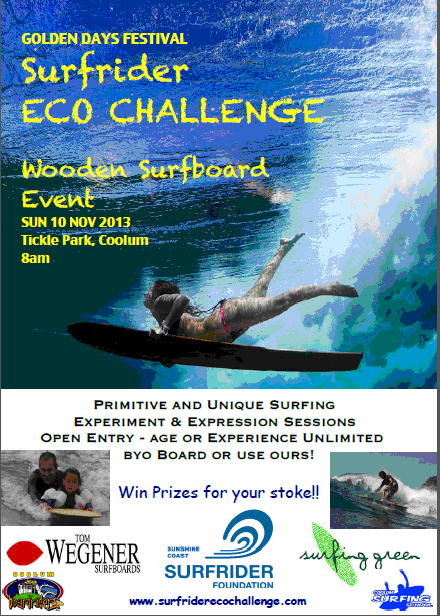
Namaste and attention Waggish Woodies. The Surfrider Foundation is hosting their annual Surfrider Eco Challenge Wooden Surfboard Event and Golden Days Festival on Sunday the 10th of November at Tickle Park, Coolum. It kicks off at 8 am with a wooden surfboard event. So bring your own woody or borrow one of theirs. There are prizes for your stoke. Tom Wegener will be there as will the guys from Surfing Green. Should be a great day for wooden surfboard builders and enthusiasts alike.
www.surfriderecochallenge.com
www.surfriderecochallenge.com
↧
↧
Wooden Boards - Hermosa Beach California 1947
A blast from the past. Some classic footage from Hermosa Beach California circa 1947. Surfing wooden paipos, shaping a 12' redwood plank with a draw knife and hand plane, surfing kook boxes and steering using your feet. No sound on this video just some great surfing history.
↧
Building a Hollow Wooden Surfboard - 6'2" Fish School Project Part 1
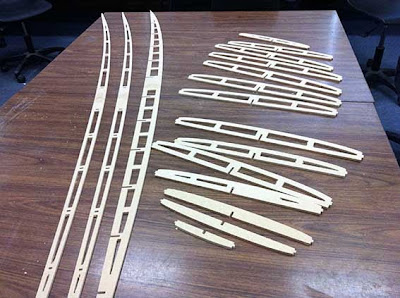
Namaste Wiley Wood Workers and welcome to this installment of building a 6'2" Fish hollow wooden surfboard. I was recently contacted by Wally, a manual arts teacher at a High School in Sydney. Wally was interested in introducing a wooden surfboard building module for students in his year 12 Industrial Technology course which would contribute towards their HSC (Higher School Certificate). Being new to wooden surfboard construction but an old hand at woodworking, Wally was looking at doing a couple of wood surfboard builds for his two sons first and then using this experience to refine the process for his students in the school workshop. Lucky Lads. He has access to a state of the art workshop with all the tools including a CNC machine and a laser cutter. The school kids were totally stoked about building wood surfboards for themselves in school time, I was totally stoked to be involved and Wally was just generally stoked that it was all starting to come together.
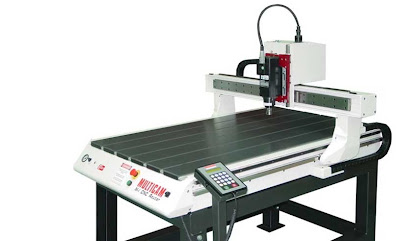
Multicam M1 CNC router with 950 mm x 1150 mm bed. A nice addition to any workshop and a permanent fixture in Wally's.
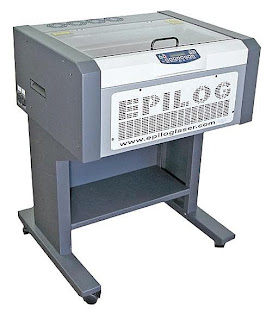
Epilog Laser 45W with 610 mm x 457 mm bed. This is an awesome machine also in Wally's workshop. It not only cuts but it can also burn artwork into your wood surfboard.
DESIGN
The first step was to gather some design requirements. They were as follows: a Fish style board, and 6'2" in length. A little light on but a good start. So we did a little research and put together a summary of Fish design attributes. This is by no means definitive but helpful in putting together a Fish design.
A wide nose with a slight point which is stable and maneuverable.
A wide thick board for buoyancy and stability making the board easy to paddle and stable to ride. A little like me.
A flatter rocker for speed and ease of catching waves.
A wide tail (with swallow tail) – a couple of reasons for this. Easy to turn but also a higher aspect ratio (tail width to board length) to assist the board in getting up on the plane.
Thick rails through the middle, sharp at the tail.
Fin setups – twin, quad and thruster. Why not go for all three and install 5 sets of fin plugs and interchange the fin setups as required.
Fish plan shapes can vary from classic shapes to modern hybrids.
Volume. Now this is a personal preference and dependent on how much buoyancy is preferred and how much paddle power is on tap. Some guys like less, some more. I approach this from a couple of angles.
1. If someone has a favourite surfboard that they enjoy surfing, I assume the volume of that particular board is okay and I measure it using AKU Shaper. I photograph the outline and side profile and use the images to do a rough design of the board in software. Once the design is complete, AKU calculates the board volume (in beers or litres). I've never really understood the metric system so I work in beers.
2. I use a rough formula of 0.6 x body weight of the surfer (The Cater Formula). This seems to work well for the average surfer. My coefficient is a bit higher (about 0.7) because I am a fat, lazy, paddle-phobic chimp.
In this case we used the formula and settled on a volume of 45 litres.
So after a few iterations in AKU we went with a 6'2" x 22 ¾” x 2 ¾” and 45 litres in volume with a flat bottom contour and slightly sharp rails towards the back. The rails up the side are quite full (60/40). 45 litres is probably a good volume for a 70+ kg person. The ribs have been spaced at 150 mm with the deck and hull fibre glassed internally to give the board added strength and longevity.
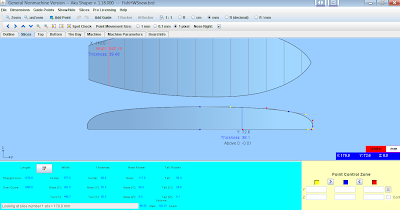
Here's a screen shot of the wooden surfboard outline in AKU Shaper. AKU Shaper doesn't seem to like designing swallow tails so I've had to go with a square tail in the design. The swallow tail can be drawn manually on templates in the work shop or added in CAD software. The outside centre point for the swallow tail is 110 mm from the tail end.
The view of the rocker/profile.
The first slice near the nose. Slices spaced at 150 mm.
The centre slice.
The tail slice at 170 mm from the board rear.
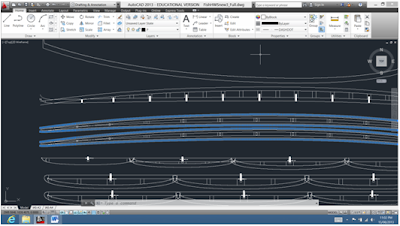
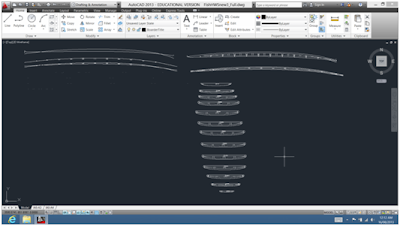
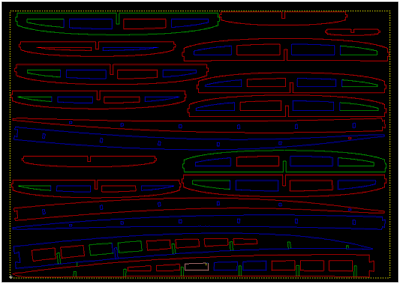
The final set of templates produced by Hollow Board Template Maker. This PDF file was converted to a DXF file, cleaned up and imported into the CNC software as machine code.
The next section will be of interest to those of you wanting to use a CNC machine to cut out your wooden board templates.
Converting PDF File to DXF Files.
Wally's first challenge was to convert the PDF file produced by the Hollow Board Template Maker software into a form that he could use on his CNC Router and Laser Technologies. After a number of phone calls and trials of PDF to DXF converters online he succeeded with Aide DXF PDF Converter. This software was easy to use and produced DXF files with curves which were polylines and relatively simple to edit.
Many hours late at night were spent working out how to best edit the DXF drawing in Auto CAD. The DXF file was 19,529KB (almost 20 Meg) and when saved as a DWG file it was much smaller at 1,616KB. It was much quicker to edit as a DWG file.
EDITING
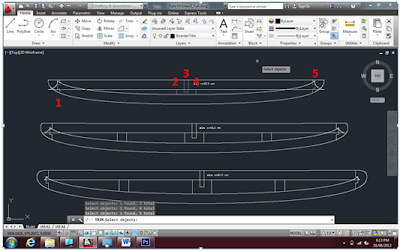
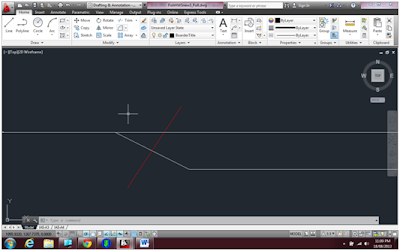
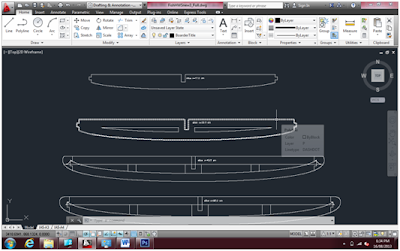
One of the first issues Wally had to deal with was mulitple lines under lines which is a problem with CNC machines. The skin lines on the rails needed to be deleted. The best way to overcome this was to select each entity by clicking each polyline and not clicking and dragging the mouse. This ensures that only the top layer of entities are selected. Select the smaller lines first, as they are much easier to see.
Use the zoom function to to make sure all entities are selected. Don’t select the shaded areas of the spline. Once selected use the "Move" command to move entities to the right of the existing lines. Duplicate lines will be left and can be deleted.
Use the Trim Command to select lines 1-5 shown above then right click and select the parts of line to Trim. Remove the lines near the center spline first to avoid problems with the others.
A continuous loop is more difficult to Trim. Zoom in and draw a line close to the intersection and then use the Trim command. Then use the Chamfer command to clean up any corners. If at any stage the entities don’t Trim properly use the Extend Command to ensure the entities are in contact to enable Trimming.
PEDIT COMMAND
PEDIT is used to combine entities into a continuous loop needed for the CNC machine. To join lines to form polylines in a continuous loop, type PEDIT, Enter, Press down arrow, then click Multiple, select all the entities, Enter, Join, fuzz Distance 2.
Move the mouse cursor over the joined entities and ensure that they have joined correctly. If the line doesn't form a complete loop, zoom in and search for the reason why.
The drawing needs to be scaled to size. Measure a known entity and scale to correct size.
When all entities have been cleaned up and the PEDIT Command used to close polylines Save file as a R12 DXF. Import file into the CNC software in Wally's case Multicam Toolpath and look for open shapes.
The green shapes are open shapes and need to be checked to determine why they haven’t joined properly. Wally found that main problem was that the corners were not trimmed. Also some curved shapes had a small gap near the spline. He used the Trim, Extend and Chamfer commands as a means of editing the entities.
At this stage he found it helpful to check for duplicated entities. He clicked on each entity and moved it aside to determine if multiple entities existed. He found a few which were deleted. The PEDIT and JOIN Commands were used extensively to join entities.
There is a problem in the Multicam Toolpath software. Wally could not reverse (for the mortice) the machining parameters from outside (blue) to inside (red). This stumped him for a few days until he Exploded one of the rectangles and found a duplicate shape underneath.
The next step was to do a trial run on the CNC machine using MDF board.
The detail of the dovetail joint for the spine and rails. The spine and rails have been cut in two sections so that they fit within the bed dimensions of the CNC machine.
Heavy duty rocker table also designed by Wally.
The rocker table fresh from the CNC machine. Still warm!
The rocker tables getting glued up. One for the Fish and another for a 9'1" longboard.
![]()
The Fish frame cut in MDF to make sure it all fits together. The production frame will be cut out of 6 mm paulownia.
Another photo of the MDF frame.
And from above.
More to come in Part 2.
The rocker tables getting glued up. One for the Fish and another for a 9'1" longboard.
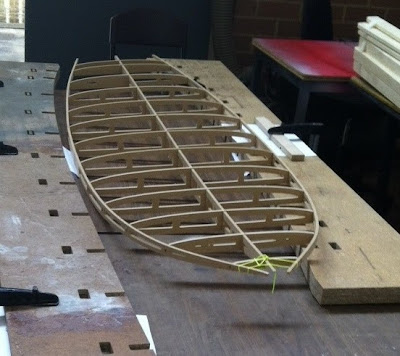
The Fish frame cut in MDF to make sure it all fits together. The production frame will be cut out of 6 mm paulownia.
Another photo of the MDF frame.
And from above.
More to come in Part 2.
↧
Building an Alaia - Jarred's 6'8" x 16"
Namaste Budding Board Builders and welcome to this installment of shaping an alaia. I had a visit from Jarred and his old man Bruce a couple of weeks ago. I work with Bruce and he'd caught wind of the fact that I'm into building wooden surfboards. His son Jarred had picked up an alaia blank and was keen to get it shaped but had no access to a workshop and tools so I offered to give him a hand.
Building an alaia is a great way of getting into wooden surfboard building. They are fairly simple to build and you only need a few basis tools like a jigsaw/coping saw, a hand plane and sand paper/orbital sander. One of the first wooden boards I built was an alaia. I'd sourced some rough sawn paulownia planks from a plantation near Mount Warning, thicknessed them and glued them together to make a blank. Alaia blanks weren't available in those days but I wish they were. It would have saved me some work. These days you can buy an alaia blank from a number of suppliers and they will post them to your door. I cut the outline using a jigsaw (I didn't have a band saw in those days) and shaped the board using an old Stanley hand plane, a spoon plane and an orbital sander.
One of the things that fascinated me about finless surfboards was their hydrodynamics and how they managed to hold a line on a wave face. Tom Wegener, the man who led the finless surfboard revival explains the concepts really well in an interview from the Alley Fish Fry in 2011.
Here's a video of Tom Wegener at the 2011 Fish Fry explaining the hydrodynamics of the Alaia. His explanation starts at 1:22 into the video.
Firstly we measured the centre of the blank at both ends and used a straight edge to mark the centre of the plank length ways. I had a template from my alaia lying around so we used that to mark the outline. First the left hand side.
....and then we flipped the template over to mark the right hand side.
Then to the bandsaw to cut the outline. A jigsaw works fine also.
The outline cut. Rough as.
Ready for some trimming with my palm planes and my bench sander.
The board ready for final shaping. A very happy chappy. I think he's hooked.
A concave from the nose to the tail, a slight chine rail along the bottom of the rails and a slight taper under the nose.
This photo shows the bottom rail-to-rail concave of my board. This runs from the tail of the board to just short of the nose.
My alaia leaning against some green. Getting a big hug from the "Giving Tree".
A sideways view of the nose. The bottom of the board is facing upwards.
This photo shows the bottom rail-to-rail concave of my board. This runs from the tail of the board to just short of the nose.
My alaia leaning against some green. Getting a big hug from the "Giving Tree".
A sideways view of the nose. The bottom of the board is facing upwards.
A spoon plane or pull shave is a great little tool to carve out the concave. Jarred borrowed mine to finish his board and used an orbital sander to give it a final sand.
The board finished complete with artwork.
↧
Building a Foam Core Wood Surfboard - A 9'1" Longboard Part 2
Namaste chisel chokers, and welcome to the second installment of Building a Foam Core Wood Surfboard - A 9'1" Longboard called....wait for it...Iva. As in Iva Big-Woody. I think the hyphen makes it sound a bit posh.
It's been a while since my last post on this particular build and I've been a little preoccupied. It's that time of the year again and that means Mrs. Wood Buddha has drawn up her customary jobs list of things for me to do around the house; fixing up the deck, digging a trench for the new gas line, getting the squeak out of her hinges. As I'm the boss of the house (when she's not around), I am obligated to perform my manly duties otherwise no playing in the Ashram for the Wood Buddha. As They say, whoever They is, "a happy wife is a happy life". That doesn't mean I haven't been able to sneak out to the shed to do a bit of work on my latest board. I just can't help it. The board calls out to me using her special powers of telepathy. The other day, the Mrs. caught me out in the shed working on my board and as she looked at me with that disapproving look that only wives and mothers seem to do so well, she said "you really just can't help yourself, can you?" I explained that the urge for me to work on my wooden surfboard is like having a roaring mongrel in my pants. It just happens and I have very little control over it. She just walked away in disgust and I got an extra hour to work on the board. Bonus!
Anyway, back to the jobs list. The Mrs. has been complaining about my deck. Personally I didn't think there was a problem with it but apparently there is. The size of my deck hasn't been an issue, but I haven't been looking after my deck over the past few years. It's starting to look a bit shabby. The wood isn't as hard as it used to be but I guess that's just because my deck is getting old. I've had quite a few of my neighbours on my deck over the years. You know, at BBQ's and parties and I guess that's why it's so worn out. The other night I woke up to the sound of a possum gnawing on my deck and I thought enough is enough. Time to put some protection on it. So I gave it a good hose down, I sanded it back with 80 grit paper and painted it and now it's as good as new. I even pruned the bushes around it and now my deck looks a whole lot bigger. But it's all an optical illusion. By the way, if you say deck with a Kiwi accent it sounds a little bit rude. But I digress.
In the first part of this post, I had cleaned up the foam blank and squared off the sides, laminated the inner rail bands, and laminated the top and bottom skins. In this part, I'll complete the outer rail laminations, shaping, sanding, fin boxes, leash plug and final coat of epoxy. I decided to go with an epoxy finish to add a bit of strength and hardness to the paulownia skins.
The surfboard ready for the first two rail bands. There will be 5 x 4 mm rail bands on each side in total. The sides have been cleaned up with a hand plane and sanding block and I've checked the outline against the original template to make sure both sides are symmetrical. I decided to do a basket weave pattern for the rail bands gluing up two rails at a time on each side. I really like the look of this pattern where the rail bands join at the nose and tail of the surfboard.
![wooden surfboard wooden surfboard]()
Marking the rail bands onto the 4 mm paulownia panels. I use the template I made previously out of some old vinyl sign material to scribe the rail band pattern onto the paulownia sheet.
Marking the rail bands onto the 4 mm paulownia panels. I use the template I made previously out of some old vinyl sign material to scribe the rail band pattern onto the paulownia sheet.
Cutting the rail bands on my bandsaw. You can also use a jigsaw with a fine blade. I also plane the edges of my rails with a small palm plane to minimise splitting when I bend the rails around the board.
![wooden surfboard wooden surfboard]()
Planing the edges of the rail bands before steaming.
Planing the edges of the rail bands before steaming.
I use masking tape around the edge of the top and bottom skins to protect the timber from glue spills. Ready for rails 1 and 2.
Steaming the rails using my custom built steam box. A one metre section of galvanised rectangular down pipe (75 mm x 100 mm) riveted to the bottom of a pizza tray. The pizza tray and down pipe have two 60 mm holes cut into them to allow the steam through. The pizza tray sits over a pot of boiling water. It works surprisingly well. The 4 mm rails bands are very soft and flexible after about 10 - 15 minutes of steaming.
2 x 60 mm holes drilled in the pizza tray and down pipe.
A couple close ups of the wet, hot, steaming box. Hey you lot! Get your mind out of the gutter!
2 x 60 mm holes drilled in the pizza tray and down pipe.
A couple close ups of the wet, hot, steaming box. Hey you lot! Get your mind out of the gutter!
After steaming the rails for 10 to 15 minutes, I tape them to the sides of the board (two at a time) for a couple of hours. If you are using polyurethane glue like I am, a little bit of moisture in the the rails will help with the curing process. If you are using an epoxy or other glue you might want to leave the rails bands until they are completely dry before gluing them to the surfboard.
![]()
I remove the masking tape and apply FMP 200 polyurethane glue to the inside faces of the rails with a squeegee. I then tape the rails to the edge of the board and allow 2 - 3 hours for the glue to dry. The advantage of using this method is that you don't need any special clamps however it does use a lot of masking tape which ends up finding its way to landfill.
![wood surfboard wood surfboard]()
The surfboard nose, glued and taped.
![wood surfboard wood surfboard]()
A shot of the nose. A fair bit of tape is needed to hold the rails in place here.
![wood surfboard wood surfboard]()
The rails at the tail all glued up.
![wood surfboard wood surfboard]()
I lay the board hull (bottom) side down to avoid any glue drips onto the timber. Gluing two rails at the same time can also be a bit fiddly.
![wood surfboard wood surfboard]()
Another shot showing the rails gluing.
I remove the masking tape and apply FMP 200 polyurethane glue to the inside faces of the rails with a squeegee. I then tape the rails to the edge of the board and allow 2 - 3 hours for the glue to dry. The advantage of using this method is that you don't need any special clamps however it does use a lot of masking tape which ends up finding its way to landfill.
The surfboard nose, glued and taped.
A shot of the nose. A fair bit of tape is needed to hold the rails in place here.
The rails at the tail all glued up.
I lay the board hull (bottom) side down to avoid any glue drips onto the timber. Gluing two rails at the same time can also be a bit fiddly.
Another shot showing the rails gluing.
After the glue has dried, I remove the tape and trim down the rail bands until they protrude 5 - 10 mm above the top and bottom skins. You don't have to do this but I find it easier to trim the rails as I go.
Trimming the nose with a dovetail saw and sanding block. Ready for rails 3 and 4 on the other side of the surfboard.
![surfboard rail jig surfboard rail jig]()
I haven't been comfortable with the amount of masking tape I have been using to hold the rail bands in position while the glue dries so I decided to experiment with a jig that uses ratchet straps as clamps. The jig bolts to the top of my shaping stands. It's at a good height that allows me to get to the underside of the surfboard.
A photo showing the other side of the jig.
Steaming rails 3 and 4 for the right hand side of the board.
Fixing rails bands 3 and 4 in place (after steaming) using ratchet clamps and my custom made rail jig. I usually leave the rails for about an hour or two to dry. This is an alternative method to using masking tape that I've been playing around with lately. It works well. A drop sheet on top protects the timber from dings and scratches from the ratchet clamps.
I initially started using a custom made jig with the nose outline cut into it and lined with foam to hold the rails in position at the board nose. The curve has to be accurate to get an even pressure on the rail at the nose. After a couple of hours, I remove the straps, apply polyurethane glue to the side of the surfboard and the inside faces of the rail bands. I position them on the side of the board, set up the ratchet straps and and gently tighten them making sure the rails are positioned correctly and firmly against the side of the board.
The timber jig holding the rails in position around the nose of the board.
Ratchet straps holding the rails in place at the centre of the surfboard.
A view of the tail.
Another shot of the board in the jig.
A photo of the board tail. I use masking tape to protect the straps from glue spills. Dried glue on the strap makes it difficult to feed into the ratchet mechanism.
The view from the tail.
A closeup of the nose jig.
A small piece of sandpaper folded over rough side out helps stop the straps from slipping near the tail of the board.
Another small piece of sandpaper folded over rough side out helps stop the straps from slipping near the nose. After 2 - 3 hours the polyurethane glue is dry, the straps are removed and the rails are ready for a rough trim.
The rails at the nose trimmed back roughly with a dovetail saw.
The same for the rail at the tail.
Trimming the top and bottom edges of the rails with a palm plane until they protrude 5 - 10 mm above the top and bottom skins.
![wood surfboard wood surfboard]()
I've been going through a fair bit of Heineken's new marine glue. Doesn't work very well on the board but it tastes great. Good tip Moasey!
I've been going through a fair bit of Heineken's new marine glue. Doesn't work very well on the board but it tastes great. Good tip Moasey!
The nose ready for some fine rhinoplasty using a dovetail saw and a sanding block.
Before...
Before...
...and after.
The tail trimmed back and sanded, ready for the first tail piece.
The first tail piece (2 x 4 mm strips) glued and taped in place.
After 2 - 3 hours the tape is removed and the tail is trimmed using a dovetail saw and sanding block.
The tail neatly trimmed. The board is now ready for the next set of rails.
Ready for rail numbers 5 and 6.
Steaming the rail bands for about 10 - 15 minutes makes them bend easily around the nose of the board.
The rail bands in the jig for an hour or two, so they bend to the contour of the surfboard nose.
Polyurethane glue has been applied and the rails are strapped in the jig for 2 - 3 hours until the glue has dried.
The tail strapped in.
Lots of straps ensure the rails are positioned firmly against the surfboard while the glue dries.
A snug fitting rail strapped against the surfboard nose. I used plywood blocks with high density foam glued to them this time. It seems to work better that the curved jig and is a little more versatile. That is I can position them wherever I need to.
The surfboard tail. The polyurethane glue foams up and expands filling every nook and granny.
I use 7 mm marine ply blocks (100 mm x 100 mm) with high density foam glued to one side. This ensures a firm pressure is applied to the rail without denting the timber. Paulownia is very soft and dents easily.
A larger section of marine ply (100 mm x 100 mm x 1 metre) with high density foam glued to one side. I use this to hold the rail to the middle section of the wooden surfboard.
Another photo of the jig near the surfboard nose.
...and another. I think you get the idea. Gluing the rail bands can be a bit tedious. Doing two at a time does shorten the process. I've been thinking about this and I've been about an alternative method that saves some time. Maybe for a future surfboard.
I was bragging recently about how steamed paulownia doesn't split when I bend it around the nose of a board. Sure enough, when I went to work on my board after making that comment, I managed to split a rail. Luckily it wasn't a big split and I managed to stop it from spreading all the way around the nose of the board. That'll teach me to keep my trap shut.
Another shot showing the split. One thing that I've learnt from building wood surfboards is that no matter how careful I am things do go wrong. I think the skill of the craftsman is in how to correct any stuff ups with style.
Ratchet straps removed and the rails ready for planing
The tail before trimming.
The tail before trimming - gecko view. I've got a lot of geckos living in my ashram. The little buggers crap all over my board if I don't cover it with a drop sheet.
The culprit.
Marking out the nose for trimming.
Planing the tops and bottoms of the rails.
The nose marked and cut with a dovetail saw.
![wood surfboard rail wood surfboard rail]()
Finished with a sanding block and 80 grit paper ready for rails 7 and 8.
Trimming the tail with a dovetail saw.
Steaming rails 7 and 8.
The board with rail bands in the jig for an hour or two.
Bending the rails to the contour of the surfboard nose.
Polyurethane glue has been applied and the rails are strapped in the jig for 2 - 3 hours until the glue has dried.
The rails held firmly in place around the surfboard nose.
The polyurethane glue dry, and ready for planing.
Using my little palm plane. I picked this one up on ebay from the USA for about $25 including postage. I use it to do all my rough work.
The board nose trimmed and sanded ready for rail band 9. Rails 9 and 10 will be single rail bands on either side of the surfboard.
The tails neatly trimmed and sanded and ready for the next tail piece (2 x 4 mm paulownia strip).
The tail piece glued and taped in position.
After 2 - 3 hours, the tape is removed and the tail is ready for a trim and clean up with 80 grit sand paper.
Steaming rail number 9.
Clamped in position after steaming.
The nose with glue drying.
The rail at the tail.
Lots of ratchet straps ensure everything is where it should be while the glue dries.
Planing the top and bottom of the rail. You can start to see the basket weave coming together at the tail.
![]()
I ended up snapping one of the rail bands while bending it around the nose. I think it needed some more time in the steam box. Some polyurethane glue and clamping and it was all fixed.
Clamping the broken rail band while the glue is drying.
![wooden surfboard wooden surfboard]()
On the home straight. Ready for rail number 10.
![]()
Steaming number 10.
In the jig after steaming.
Applying glue to the inside face of the rail.
The view from underneath the board.
Lots of straps especially at the nose. This rail was a stubborn little piggy and I didn't want it breaking for the second time.
Just 2 -3 hours and then the fun bit starts. Shaping.
The tail - ready for a trim.
Out of the jig and ready for the spoke shave.
The next stage involves planing the top and bottom of the rails to the top (deck) and bottom (hull) contours of the board. I take my time with this part of the process and make sure my spoke shave and hand planes are nice and sharp.
Planing back the top of the rails to the top contour of the surfboard.
Planing the top of the rails near the nose.
A sharp spoke shave makes light work of the rails.
The tail is starting to look the goods. The basket weave pattern is really starting to stand out. There is still one more tail piece to glue on.
The top of the rail planed and sanded back to the contour of the deck.
My adjustable Kunz spoke shave is a pleasure to use. German precision at its best.
Another view looking towards the tail.
The nose planed and ready for some light sanding.
![wood surfboard wood surfboard]()
A close up showing the top of the rail planed down the the deck contour of the surfboard. You can also see the squared rail edge.
Gluing on the last tail piece.
A view of the tail block from the back.
Gecko view of the tail.
The basket weave pattern underneath the nose.
![]()
Shaping tools. A profile guide, spoke shave, palm plane, foam sanding block and 80 grit sand paper.
![wooden surfboard wooden surfboard]()
Starting the shaping process with a spoke shave.
Shaping the rails towards the tail.
A close up of the tail.
I wasn't overly happy with the rail lap joints at the nose and decided to go with a nose block. Some severe rhinoplasty with a tenon saw.
Cleaning up the cuts with 80 grit sand paper and a sanding block.
Gecko view.
A closeup showing the rail construction.
Gluing up the nose block. Paulownia with cedar feature strips.
Gluing the nose block to the board using polyurethane glue.
Lots of tape and a ratchet strap.
Cutting the nose outline with a jigsaw.
Some sanding with 80 grit sand paper and the nose block is starting to take shape. I work may way through finer grades of sand paper. 120, 180 and 240 grit.
A closeup of the nose block.
The cedar feature strips really compliment the paulownia.
Where the rail meets the nose block. A happy union.
The board out in the sunshine soaking up some rays and ready for a coat of resin. I finish sanded it with 240 grit sand paper.
![]()
Ready to apply a resin coat to the top. My weapons of choice. I use about 150 grams of resin. I squeegee it on first then roll the shit out of it (evenly) with a small roller then finish with a foam brush.
The deck after a coat of epoxy resin. The colour and the grain of the timber really jumps out.
The top of the nose.
The resin really brings out the detail in the joinery at the tail.
After 24 hours it's time to do the bottom. I've lightly sanded the bottom of the rails with 240 grit sand paper. I use about 150 grams of resin on the bottom as well. Squeegee, roll and finish with a foam brush.
Looking nice. After 2 -3 days I give the whole board a light wet sand with 240 grit wet and dry sand paper.
Routing the slot for centre fin box.
Dry fitting the fin box.
A nice neat clean slot for the fin box.
![installing surfboard leash plug installing surfboard leash plug]()
Drilling the hole for the leash plug with a 30 mm Forstener bit and jig. The jig ensures a nice clean cut and aligns the drill bit accurately.
Blue tack under the jig ensures it doesn't move around and also protects the timber from scratches.
Dry fitting the leash plug.
Drilling the holes for the side fin plugs.
The jig ensures neat cuts.
Ready for the fin boxes and plugs.
The leash plug hole taped and ready for gluing.
![installing surfboard leash plug installing surfboard leash plug]()
The leash plug with epoxy curing.
Gluing in the centre fin box. I use epoxy resin thickened with micro balloons which are a rich chocolate brown colour. I use a square to make sure the fin is perpendicular to the bottom of the board and then tape it in place while the epoxy cures. I also make sure that this part of the board is level to prevent the epoxy running.
![installing surfboard fins installing surfboard fins]()
The centre fin box after the epoxy resin has cured. Some small bubble holes toward the back can be filled after sanding.
Gluing the side fins. I copied the cant from my long board and used a sliding bevel to measure and check the cant angle of the side fins.
Masking tape holds the fin in place while the epoxy resin cures.
A second application of epoxy and micro balloons to fill small holes around the centre fin box.
Filling small holes around the side fin plugs with epoxy and micro balloons.
After sanding with a 240 grit disk and orbital sander.
Ready for the epoxy finish coat on the deck. I use about 90 grams of resin measured by weight using a set of diet scales.
I roll on the epoxy and then finish with a foam brush.
The nose after the hot coat.
Finished and ready for a test ride.
Another shot showing the split. One thing that I've learnt from building wood surfboards is that no matter how careful I am things do go wrong. I think the skill of the craftsman is in how to correct any stuff ups with style.
Ratchet straps removed and the rails ready for planing
The tail before trimming.
The tail before trimming - gecko view. I've got a lot of geckos living in my ashram. The little buggers crap all over my board if I don't cover it with a drop sheet.
The culprit.
Marking out the nose for trimming.
Planing the tops and bottoms of the rails.
The nose marked and cut with a dovetail saw.
Finished with a sanding block and 80 grit paper ready for rails 7 and 8.
Trimming the tail with a dovetail saw.
Steaming rails 7 and 8.
The board with rail bands in the jig for an hour or two.
Bending the rails to the contour of the surfboard nose.
Polyurethane glue has been applied and the rails are strapped in the jig for 2 - 3 hours until the glue has dried.
The rails held firmly in place around the surfboard nose.
The polyurethane glue dry, and ready for planing.
Using my little palm plane. I picked this one up on ebay from the USA for about $25 including postage. I use it to do all my rough work.
The board nose trimmed and sanded ready for rail band 9. Rails 9 and 10 will be single rail bands on either side of the surfboard.
The tails neatly trimmed and sanded and ready for the next tail piece (2 x 4 mm paulownia strip).
The tail piece glued and taped in position.
After 2 - 3 hours, the tape is removed and the tail is ready for a trim and clean up with 80 grit sand paper.
Steaming rail number 9.
Clamped in position after steaming.
The nose with glue drying.
The rail at the tail.
Lots of ratchet straps ensure everything is where it should be while the glue dries.
Planing the top and bottom of the rail. You can start to see the basket weave coming together at the tail.
I ended up snapping one of the rail bands while bending it around the nose. I think it needed some more time in the steam box. Some polyurethane glue and clamping and it was all fixed.
Clamping the broken rail band while the glue is drying.
On the home straight. Ready for rail number 10.
Steaming number 10.
In the jig after steaming.
Applying glue to the inside face of the rail.
The view from underneath the board.
Lots of straps especially at the nose. This rail was a stubborn little piggy and I didn't want it breaking for the second time.
Just 2 -3 hours and then the fun bit starts. Shaping.
The tail - ready for a trim.
Out of the jig and ready for the spoke shave.
The next stage involves planing the top and bottom of the rails to the top (deck) and bottom (hull) contours of the board. I take my time with this part of the process and make sure my spoke shave and hand planes are nice and sharp.
Planing back the top of the rails to the top contour of the surfboard.
Planing the top of the rails near the nose.
A sharp spoke shave makes light work of the rails.
The tail is starting to look the goods. The basket weave pattern is really starting to stand out. There is still one more tail piece to glue on.
The top of the rail planed and sanded back to the contour of the deck.
My adjustable Kunz spoke shave is a pleasure to use. German precision at its best.
Another view looking towards the tail.
The nose planed and ready for some light sanding.
A close up showing the top of the rail planed down the the deck contour of the surfboard. You can also see the squared rail edge.
Gluing on the last tail piece.
A view of the tail block from the back.
Gecko view of the tail.
The basket weave pattern underneath the nose.
Shaping tools. A profile guide, spoke shave, palm plane, foam sanding block and 80 grit sand paper.
Starting the shaping process with a spoke shave.
Shaping the rails towards the tail.
A close up of the tail.
I wasn't overly happy with the rail lap joints at the nose and decided to go with a nose block. Some severe rhinoplasty with a tenon saw.
Cleaning up the cuts with 80 grit sand paper and a sanding block.
Gecko view.
A closeup showing the rail construction.
Gluing up the nose block. Paulownia with cedar feature strips.
Gluing the nose block to the board using polyurethane glue.
Lots of tape and a ratchet strap.
Cutting the nose outline with a jigsaw.
Some sanding with 80 grit sand paper and the nose block is starting to take shape. I work may way through finer grades of sand paper. 120, 180 and 240 grit.
The cedar feature strips really compliment the paulownia.
Where the rail meets the nose block. A happy union.
The board out in the sunshine soaking up some rays and ready for a coat of resin. I finish sanded it with 240 grit sand paper.
Ready to apply a resin coat to the top. My weapons of choice. I use about 150 grams of resin. I squeegee it on first then roll the shit out of it (evenly) with a small roller then finish with a foam brush.
The deck after a coat of epoxy resin. The colour and the grain of the timber really jumps out.
The top of the nose.
The resin really brings out the detail in the joinery at the tail.
After 24 hours it's time to do the bottom. I've lightly sanded the bottom of the rails with 240 grit sand paper. I use about 150 grams of resin on the bottom as well. Squeegee, roll and finish with a foam brush.
Looking nice. After 2 -3 days I give the whole board a light wet sand with 240 grit wet and dry sand paper.
Routing the slot for centre fin box.
Dry fitting the fin box.
A nice neat clean slot for the fin box.
Drilling the hole for the leash plug with a 30 mm Forstener bit and jig. The jig ensures a nice clean cut and aligns the drill bit accurately.
Blue tack under the jig ensures it doesn't move around and also protects the timber from scratches.
Dry fitting the leash plug.
Drilling the holes for the side fin plugs.
The jig ensures neat cuts.
Ready for the fin boxes and plugs.
The leash plug hole taped and ready for gluing.
The leash plug with epoxy curing.
Gluing in the centre fin box. I use epoxy resin thickened with micro balloons which are a rich chocolate brown colour. I use a square to make sure the fin is perpendicular to the bottom of the board and then tape it in place while the epoxy cures. I also make sure that this part of the board is level to prevent the epoxy running.
The centre fin box after the epoxy resin has cured. Some small bubble holes toward the back can be filled after sanding.
Gluing the side fins. I copied the cant from my long board and used a sliding bevel to measure and check the cant angle of the side fins.
Masking tape holds the fin in place while the epoxy resin cures.
A second application of epoxy and micro balloons to fill small holes around the centre fin box.
Filling small holes around the side fin plugs with epoxy and micro balloons.
After sanding with a 240 grit disk and orbital sander.
Ready for the epoxy finish coat on the deck. I use about 90 grams of resin measured by weight using a set of diet scales.
I roll on the epoxy and then finish with a foam brush.
The nose after the hot coat.
Finished and ready for a test ride.
The board weighs in at 8.5 kg (19 lbs) compared to the original PU board which was 7.6 kg (17 lbs).
I also gave the board a final wet sand with P600 wet and dry sand paper.
Special thanks to Grant Newby for sharing his foam core building method, Geoff Moase from Dovetail Surfboards for his superior quality paulownia and Rob & Carl from Southcoast Foam for cutting the foam blank and putting up with a millions of questions and emails from me.
And a very big special thanks to my very patient and understanding wife Alex.
Each wooden surfboard that I make is a learning experience. So I've included some of the takeouts for me below.
1. Building surfboards and young children do not mix well. Although I hope that one day wooden surfboard building is an activity that I can share with my two boys (4 and 6), now is not the time to have them running around in the ashram and having access to my tools particularly those that have the power to maim or kill. Let me assure you that being held hostage by a 4 year old with a nail gun is a life changing experience.
2. Using a rocker table to hold the profile of the board true while vacuum bagging and gluing the top and bottom skins to foam is something I will do on my next board. I did use wood blocks under the nose and tail but support at other points under the board would have been better.
3. Sanding the top and bottom of the foam core helps to reduce the amount of glue used. It's probably not so critical on a longboard but for a surfboard where weight is a consideration, this would help to reduce the amount of glue and glue weight.
4. Things do and will go wrong. Adapt, modify and overcome.
5. Take your time and don't rush.
6. The steam box and rail jig are two tools that worked well in this build. I will continue to use them on future boards.
7. 50% fine paulownia dust and 50% wheat flour mixed with polyurethane glue to make a stiff putty works well as a filler on small gaps and cracks. It provides a nice colour match with the pauownia timber.
8. It's much easier to sand the top and bottom panels on a flat surface before they get glued to the foam core and sand them to a final grade of 240 grit. A random orbit sander works well or if you have access to a drum sander that's even better. Ideally you can buy the panels already made and sanded from Geoff Moase at www.paulowniatimbersales.com.au.
Ride Report (December 2013)
I just got back from a week at Caloundra on the Sunshine Coast. Had about 6 sessions on the board. Most days were waist high onshore wind swell and bumpy. Managed to get a clean day with waves at chest height after 2 days of strong on shore south easterly winds.
Overall I am very happy with the way the board performs. It paddles easily, catches waves easily which I think is helped by the kick in the tail. It turns well although I would like to play around with the placement of the centre fin a bit more to see how the fin position changes the way the board turns. The extra board weight is a real bonus with lumpy waves and the board has a nice momentum and drive.
↧
↧
Building a Wood Boogie Board
Namaste Log Dodgers and welcome to this installment of building a Wood Boogie Board. Yes, you guessed it. I've got the boogy fever, I thinks it's going around.
I was recently checking out the surf at Currimundi on the Sunny Coast. It was on-shore, messy garbage wind swell and not worth getting my woody wet. Very disappointing really. But as I made my way back to the Buddha Mobile I spied something out of the corner of my little eye, something beginning with "B". It was a rather sad looking boogie board discarded in the car park rubbish bin. The skins were half pealed off, it was covered in wet sand and it looked in a very sorry state. The foam core was in relatively good condition so I thought to myself, "Wood Buddha, here's a fine instrument of surf sport on the down and out. Time to use your skills for good and give this puppy a new lease of life". It's time for a Boogie Board extreme makeover.
Enter my latest project. So I rescued the foam core, brought it back to the ashram and started work on recycling the old bugger. I had a heap of 4 mm thick paulownia off-cuts lying around which were perfect for the skins and rails so I pulled up my trousers, zipped up my fly and made a start.
The first step was to mark and trim the tail straight using a sharp craft knife.
Then I sanded the sides, front and back square with 80 grit sand paper with my custom made sanding block.
The custom made sanding block keeps the edges perfectly square to the deck.
I made a jig out of scrap pine to glue the rails to the foam. I'll also use this jig to shape the rails after I steam them.
Gluing on the nose block with Polyurethane glue.
And the tail block.
The glue is dry after 2 hours and the nose and tail strips are ready for trimming.
Trimming the top and bottom edges of the nose and tail strips with my palm plane.
The ends are trimmed with a dovetail saw and finished with sand paper.
Trimmed up and ready for the rails.
The first rail getting glued onto the right hand side of the board. The rail on the opposite side has no glue on it and is just being used to stop the straps cutting into the foam. The two large timber blocks on the top and bottom of the bottom of the foam help to keep the board nice and flat as the foam core had a slight bow in it.
Gluing the second rail onto the opposite side.
The glue is dry and the rails are ready for a trim.
Trimming the rails with my palm plane. I use a sanding block to clean up the ends.
All trimmed up and ready for the top and bottom skins.
A photo of the under side.
Taping up the top and bottom skins using the tape and hinge method. The tape on either side of the join stops the glue from spreading onto the panel and making a mess.
Taping the other side of the panel. This tape join forms the hinge.
Hinging the tape join over the edge of my work table and applying a thin bead of polyurethane glue.
I then place plastic sheeting over the panel, a sheet of ply and special clamping bricks to keep it all flat.
The glue dry and the tape ready to be removed. After the tape is removed there is very little sanding required. The joins are nice and neat.
Marking a centre line on the skins. This helps with lining up the foam core with the panel.
The centre of the nose piece on the foam core.
Laying the foam core on the panel and marking the outline with a pencil. I allow an extra 5 mm overlap.
The panel marked to the outline of the core and ready for cutting.
A sharp craft knife cuts the paulownia easily.
Cut and ready for sanding. There are two of these panels. One for the top of the board and one for the bottom.
![wood boogie board wood boogie board]()
Finishing with an orbital sander. 80 grit then 120 grit then finished with 180 grit.
Applying Poyurethane glue to the top of the board. I leave it to foam up for about 5 minutes before taping on the top panel and placing the board in a vacuum bag. I did the top panel first then the bottom panel later. Ideally it's best to glue both panels at the same time as the vacuum bag tends to flatten the low density foam.
In the bag with the bejesus sucked out of it. I use a vacuum pressure of about 15" of Hg.
Out of the vacuum bag after 2 hours.
![wood boogie board wood boogie board]()
Bending the nose of the bottom panel using a steam iron. Firstly I wet the timber with some wet towels for about 10 - 15 minutes. Then heat the panel with the steam iron as I bend the tip of the panel with my hand. I then clamp it in place for a couple of hours (ideally overnight) using a piece of timber and a clamp.
Polyurethane glue is spread on the foam on the bottom of the board and left to froth for about 5 minutes. The bottom panel is taped in place and it's all put in the vacuum bag for about 2 - 3 hours.
Out of the bag after 2 -3 hours and ready for a trim.
Steaming the cedar and paulownia rails for one side of the board.
The rails are clamped in a jig while the timber is pliable from the steam. I leave the rails in the jig for a couple of hours.
The first cedar rail band is glued in place with polyurethane glue. This rail will be a feature strip.
I used a steam iron to bend the cedar rail on the other side and taped it in place while the timber cools. Using the steam iron to bend the timber is a lot simpler than using my steam box. I wet the timber first with wet towels.
Gluing the cedar rail on the opposite side using polyuretahne glue and holding it in place with tape and a couple of straps.
After the glue has dried (2-3 hours), I trim the ends of the rails. It's then ready for the nose and tails pieces.
Gluing the cedar nose and tail pieces.
![]()
Trimming the cedar nose and tail pieces once the glue has dried.
The paulownia rail glued to the left hand side of the board. I bent it using the steam iron before gluing it in place.
The paulownia rail glued to the right hand side of the board. I bent it using the steam iron before gluing it in place.
Trimming the ends of the rails with a dovetail saw and sanding block.
Gluing the tail and nose pieces in place.
The final rail bands going on. One on the right.
One on the left.
Out in the sunshine getting nice and warm and ready for a coat of lanolin grease.
All finished and ready for a test drive.
Finishing with an orbital sander. 80 grit then 120 grit then finished with 180 grit.
In the bag with the bejesus sucked out of it. I use a vacuum pressure of about 15" of Hg.
Out of the vacuum bag after 2 hours.
Bending the nose of the bottom panel using a steam iron. Firstly I wet the timber with some wet towels for about 10 - 15 minutes. Then heat the panel with the steam iron as I bend the tip of the panel with my hand. I then clamp it in place for a couple of hours (ideally overnight) using a piece of timber and a clamp.
Polyurethane glue is spread on the foam on the bottom of the board and left to froth for about 5 minutes. The bottom panel is taped in place and it's all put in the vacuum bag for about 2 - 3 hours.
The venturi vacuum pump and bag setup. The venturi vacuum pump is connected to my compressor.
My weapons of choice for cleaning up the nose, tail and rails. The next stage is to glue on the rails, nose and tail blocks.
Taping up the top and bottom of the board. The tape protects the timber from glue spills.
The rails are clamped in a jig while the timber is pliable from the steam. I leave the rails in the jig for a couple of hours.
The first cedar rail band is glued in place with polyurethane glue. This rail will be a feature strip.
I used a steam iron to bend the cedar rail on the other side and taped it in place while the timber cools. Using the steam iron to bend the timber is a lot simpler than using my steam box. I wet the timber first with wet towels.
Gluing the cedar rail on the opposite side using polyuretahne glue and holding it in place with tape and a couple of straps.
After the glue has dried (2-3 hours), I trim the ends of the rails. It's then ready for the nose and tails pieces.
Gluing the cedar nose and tail pieces.
Trimming the cedar nose and tail pieces once the glue has dried.
The paulownia rail glued to the left hand side of the board. I bent it using the steam iron before gluing it in place.
Trimming the paulownia rail band.
The paulownia rail glued to the right hand side of the board. I bent it using the steam iron before gluing it in place.
Trimming the ends of the rails with a dovetail saw and sanding block.
Gluing the tail and nose pieces in place.
Trimming the second set of rails with a palm plane.
One on the left.
Gluing on the tail and nose pieces. Once the glue has cured, the top and bottom edges of the rail bands, nose and tail pieces are all trimmed. The rails are shaped and the entire board is given a final sand with 240 grit sand paper.
All finished and ready for a test drive.
↧
Building a Foam Core Wood Shortboard - The Yang
Paul with the Ying and the Yang.
Namaste Stick Strokers and welcome to this installment of building a foam core wooden short board called "The Yang". Confucius say, for every ying (or yin) there is a yang and for every yang there is a ying, It's okay to play with your own ying, but if you get caught touching someone else's yang, especially without their permission you're gonna can get into a whole heap of trouble. "So is there a ying for this yang Wood Buddha?" I hear you ask. Chit yeah! Read on Oh wise and noble reader and prepare to be enlightened.
My mate Paul has been watching my wooden board building escapades with curiosity for some time now. We are both very interested in sustainable surfboard construction and have been keen to see how wooden surfboards compare to their polyurethane fibreglass cousins in terms of performance. So how does a wood surfboard compare to a PU board of the exact same design? This is a great question and got us thinking about setting up an experiment. Could we design a board and build it using conventional polyurethane foam and fibreglass and also build the exact same board using wood and EPS foam for a performance comparison? The two surfboards could be surfed side by side by so to speak and compared.
I'm always up for a challenge, so late in 2013 we set about designing a board in AKU Shaper for small to medium size surf that we could use as our lab rat. We had this design machine shaped for accuracy from a PU blank and had it glassed conventionally by Yoshi Takeda on Queensland's Gold Coast. Yoshi is well known for his glassing prowess and amazing tints and artwork. This board is called "The Ying". We also had the same design shaped on a machine from a high density (VH) EPS blank and this would be made into a wood skinned board called "The Yang". The two boards would be identical so a performance comparison could be made.
Cool idea, huh?
The design for "The Ying". The design was machined from PU and glassed using conventional surfboard construction techniques.
The design for "The Yang". Exactly the same as "The Ying" however the rails have been squared off and the overall thickness has been reduced to allow for the timber skins and rails. Once the timber is laminated onto the foam core, it will be the exact same dimensions as its PU cousin. We used a high density (VH) EPS blank for the board core.
The Ying.
Geoff Moase from Paulownia Timber Sales mentioned that he had some 10 mm x 150 mm rough sawn paulownia boards available. This size is perfect for thicknessing down to 5 mm or 6 mm boards for wood surfboards and it saves me re-sawing thicker timbers on my bandsaw. So I thought I would give them a go. The quality of this timber is superb. Clean, white and no knots.
Dressing the edges of the boards with my thicknesser. I screw the boards together at the ends and run them through my thicknesser to dress up the edges. Works a treat! The edges are perfectly square, ready for jointing them together into 600 mm panels. I also thickness these boards down to 5 mm.
Using the tape and hinge method for gluing the boards together to make 600 mm panels.
The panels glued and drying under a sheet of ply with special clamping bricks.
The foam core, kindly machine shaped by the guys at South Coast Foam.
Cleaning up and squaring off the rails with a sanding block.
Making a rail template from an old vinyl sign.
Gluing on the first tail piece. I use polyurethane glue for this.
Marking out the inside rails on a 5 mm paulownia panel. The paulownia is a soft timber and can be cut with a craft knife (with a bit of effort).
Trimming the tail piece. This is done once the glue has dried.
Wetting the tail end of the first rail band with a wet hand towel. I then use Mrs Wood Buddha's steam iron to bend the timber to the shape of the foam core and tape it in place for a couple of hours.
...and the same for the nose.
A simple rocker jig made from scrap pine and 6 mm bracing ply. This is used to keep the board rocker true while gluing on the inner rail band and the deck and hull skins.
A simple rocker jig made from scrap pine and 6 mm bracing ply. This is used to keep the board rocker true while gluing on the inner rail band and the deck and hull skins.
The first rail band glued and taped in place. The PU glue is dry in a few hours.
Wetting and steaming the rail ends of the opposite inside rail.
The second inside rail band glued and taped in place.
I use a small 6 gauge screw to fix the rail to the tail block while the glue dries. It's removed once the glue is dry. The hole will be filled with glue and covered by the outside rail bands.
Trimming the rails back to the bottom and top contours of the foam core with my Kunz Beaver Tail Palm Plane, my favourite tool.
A close up of the nose after trimming. The gap that you see will be filled with frothing PU glue when the top and bottom skins are glued in place.
...and the tail.
Spring clamps hold the board in position while I mark out the deck and hull skins. I allow a 5 mm overlap.
Marking the outline of the hull skin at the tail.
Cutting the deck and hull skins out using a sharp craft knife.
The skins cut and ready for sanding.
Sanding the skins using a random orbital sander. I do a rough sand on both sides with a 60 grit disk. Then I sand the side that will face outwards (the good side) with a 120 grit disk and then a final sand using a 180 grit disk.
Taping up the joints and any knot holes with masking tape. This prevents any glue from oozing out and staining the timber during the vacuum bagging process.
Applying the polyurethane glue (Fix It Mate FMP 200). I squeegee the glue on the both sides of the foam, and mist it lightly with water from a spray bottle.
I then tape the deck and hull skins in place over the foam core to hold everything in place while I slip the whole board into the vacuum bag.
Sealing up the bag and placing the whole thing on the rocker table. I use some bricks to hold the board down so that it fits snugly on the rocker table. I then suck the bejesus out of it (20" Hg) and leave it to cure for 2 -3 hours depending on the temperature.
The hose connection on the vacuum bag.
***Out of the bag after 2 - 3 hours.
A view of the tail. You can see how the deck skin has curved to the contour of the foam blank.
A view of the nose. I sand the deck and hull skins to a taper (2 - 3 mm) before gluing to allow them to form evenly to the nose rocker of the board.
The double concave at the tail.
Trimming and sanding the edges of the board using a combination of palm planes and sanding blocks.
Getting a big hug from the giving tree and ready for the rail bands.
![]()
Taping the top and bottom skins near the rails helps protect the timber from glue spills.
![]()
Cutting out the paulownia rails.
And some Suriname Cedar rails which will be used as a feature.
The top timber panel tends to separate at the centre joint during the vacuum bagging process particularly if the nose of the board has a bit of rocker. I like to put a small diamond piece to cover the gap.
Gluing in the new piece with polyurethane glue.
After the glue has dried.
Some sanding and it looks a million bucks. Well l I think so!
Marking off the rounded square tail. It's going to be interesting getting the rails to bend around this curve.
The tail after some sanding. Ready for the first 4 mm paulownia rail band.
So the next heap of photos shows the build process for the rails. It's a bit tedious but I like to document my surfboard builds in detail. The first two rails on each side of the board will be 4 mm paulownia. The second two rails on each side of the board will be 3 mm Suriname Cedar veneer. All up the total thickness of the outer rail is 14 mm.
Steaming the first paulownia rail for about 15 - 20 minutes.
I've clamped the rail in my latest invention. I like to call it the rail-o-mater.
The foam pads provide an even clamping pressure holding the rail to the board.
I leave the rail in the jig for about 2 - 4 hours.
I then release the rail out of the jig, apply polyurethane glue to the inside surface of the rail and clamp it back in the jig for 2 - 3 hours while the glue dries.
This clamping pad provides downward pressure on the board holding it nice and tight in the jig.
A luggage strap holds the rail nice and tight at the board nose.
After the glue has dried, I remove the board from the jig and trim the tail and nose using a fine dovetail saw and a sanding block.
A photo of the nose after trimming. I am very impressed with how this jig works. The rail joints appear very crisp and it makes an easy job of working with the rails. It also helps with reducing waste from masking tape. The rail jig cost less than $100 to make.
Steaming the rail for the other side of the board.
The rail for the other side of the board is clamped in place after steaming.
A nice tight overlap joint at the tail. I am surprised at how well the rail bends around the tail of the board. Steaming the rail helps.
A wooden wedge helps apply a little extra pressure at the tail.
A luggage strap helps to hold the rail at the nose end of the board.
![]()
Trimming the nose.
![]()
...and the tail.
Rail number three. The stainless steel ruler helps support the rail through the bend and stops it from breaking.
Rail number three before trimming.
The nose before trimming.
While I was building the Yang, Paul showed up with the Ying. Yoshi Takeda had just finished polishing the gloss coat that morning. The tint work is amazing. It's a shame we 're going to wax this puppy up, but it's all in the name of surf science.
Gluing rail number four.
Using the stainless steel ruler again to support the bending rail.
Strapping in the rail at the nose.
The tail ready for a trim.
...and the nose.
All trimmed up. Nice and neat.
The tail is done and now it's time for the cedar rails.
Gluing the first two cedar rails to the right hand side of the board. These were done two at a time and were steamed first. The cedar rails are 3 mm thick and are rotary peeled from a log. This makes them a bit of a challenge to work with as they tend to warp and twist.
![]()
That stainless steel ruler sure is handy for bending timer.
A luggage strap to hold the rail in place at the nose of the board.
Trimming the rail at the nose after the glue has dried. Polyurethane glue only takes a couple of hours to cure.
The tail before trimming.
Steaming the last of the cedar rails.
Waiting for the glue to cure.
A closeup of the nose.
...and the tail.
The nose all trimmed up.
The tail ready for a trim.
Trimming the top and bottom edges of the rails. I like to leave the masking tape on as it protects the timber from tool marks.
A sharp spoke shave and palm plane make quick work of this job. I take my time and find this part of the process is very meditative.
My little 5 year old apprentice with a dust brush. Usually he has a claw hammer and is on a search and destroy mission.
![]()
Some nice detail at the nose.
![]()
...and the tail.
![]()
The next step is the fun bit - shaping the rails.
I shape the rails with a spoke shave and 80 grit sandpaper on a foam pad. I then finish sand the whole board in 180 grit sandpaper. Shaping the rails usually takes me about 6 - 8 hours.
Ready for the first coat of epoxy on the top of the board. I haven't used West System resin before so this was a first for me. West System also have a 207 hardener which is specifically designed for wood.
I tape up the bottom so that I get a nice clean resin line.
I apply the resin using a squeegee and then use a gloss foam roller to get an even layer of resin over the whole board. I use a foam brush to get rid of any bubbles on the surface of the resin. The colour of the timber really pops out once the epoxy is applied. The paulownia turns a honey gold colour and the Suriname Cedar is rich brown and bronze depending on the light. I use 60 grams of resin on the top of the board and 60 grams on the bottom for the first coat.
The bottom of the board before the epoxy coat.
...and after.
Marking out the Futures fin box slots.
Marking out the hole for the leash plug.
My custom made Futures template. I wasn't keen on spending $150 for an authentic Futures jig and installation kit. Instead I made up a simple jig and used a 16 mm straight router ($11) bit and a 32 mm rabbeting bit ($22).
Routing out the slots for the fin boxes. An interesting thing about Futures fins is that you don't have to allow for any cant in the fin boxes. The cant is built into the fins themselves. The fin boxes are mounted perpendicular to the bottom plane of the board.
A close up of the fin slot.
I then seal the timber in and around the fin slot with some epoxy resin.
Drilling the hole for the leash plug. Paul wanted a heavy duty leash plug for this board hence the 35 mm hole.
I also seal up the timber around the leash plug hole with some epoxy.
Gluing in the fin boxes with black tinted epoxy resin. The resin is also thickened slightly with Carbosil a silicon based thickening agent.
Gluing in the leash plug.
After the resin has dried, I sand back the fin plugs flush with the bottom of the board. I found installing the the Futures fin plugs a little bit fiddly and not as easy as the FCS type plugs.
The same for the leash plug.
The Swedes sure make a mighty fine pear cider by the way.
Paul giving the whole board a wet rub with 240 grit wet and dry paper before the final epoxy coat.
The Ying and the Yang.
A final coat of epoxy on the top and bottom. 40 grams of epoxy on each side.
...and he can't wait to get his new woody wet.
Spring clamps hold the board in position while I mark out the deck and hull skins. I allow a 5 mm overlap.
Marking the outline of the hull skin at the tail.
Cutting the deck and hull skins out using a sharp craft knife.
The skins cut and ready for sanding.
Sanding the skins using a random orbital sander. I do a rough sand on both sides with a 60 grit disk. Then I sand the side that will face outwards (the good side) with a 120 grit disk and then a final sand using a 180 grit disk.
Taping up the joints and any knot holes with masking tape. This prevents any glue from oozing out and staining the timber during the vacuum bagging process.
Applying the polyurethane glue (Fix It Mate FMP 200). I squeegee the glue on the both sides of the foam, and mist it lightly with water from a spray bottle.
I then tape the deck and hull skins in place over the foam core to hold everything in place while I slip the whole board into the vacuum bag.
Sealing up the bag and placing the whole thing on the rocker table. I use some bricks to hold the board down so that it fits snugly on the rocker table. I then suck the bejesus out of it (20" Hg) and leave it to cure for 2 -3 hours depending on the temperature.
The hose connection on the vacuum bag.
***Out of the bag after 2 - 3 hours.
A view of the tail. You can see how the deck skin has curved to the contour of the foam blank.
A view of the nose. I sand the deck and hull skins to a taper (2 - 3 mm) before gluing to allow them to form evenly to the nose rocker of the board.
The double concave at the tail.
Trimming and sanding the edges of the board using a combination of palm planes and sanding blocks.
Getting a big hug from the giving tree and ready for the rail bands.
Taping the top and bottom skins near the rails helps protect the timber from glue spills.
Cutting out the paulownia rails.
And some Suriname Cedar rails which will be used as a feature.
The top timber panel tends to separate at the centre joint during the vacuum bagging process particularly if the nose of the board has a bit of rocker. I like to put a small diamond piece to cover the gap.
Gluing in the new piece with polyurethane glue.
After the glue has dried.
Some sanding and it looks a million bucks. Well l I think so!
Marking off the rounded square tail. It's going to be interesting getting the rails to bend around this curve.
The tail after some sanding. Ready for the first 4 mm paulownia rail band.
So the next heap of photos shows the build process for the rails. It's a bit tedious but I like to document my surfboard builds in detail. The first two rails on each side of the board will be 4 mm paulownia. The second two rails on each side of the board will be 3 mm Suriname Cedar veneer. All up the total thickness of the outer rail is 14 mm.
Steaming the first paulownia rail for about 15 - 20 minutes.
I've clamped the rail in my latest invention. I like to call it the rail-o-mater.
The foam pads provide an even clamping pressure holding the rail to the board.
I leave the rail in the jig for about 2 - 4 hours.
I then release the rail out of the jig, apply polyurethane glue to the inside surface of the rail and clamp it back in the jig for 2 - 3 hours while the glue dries.
This clamping pad provides downward pressure on the board holding it nice and tight in the jig.
A luggage strap holds the rail nice and tight at the board nose.
After the glue has dried, I remove the board from the jig and trim the tail and nose using a fine dovetail saw and a sanding block.
A photo of the nose after trimming. I am very impressed with how this jig works. The rail joints appear very crisp and it makes an easy job of working with the rails. It also helps with reducing waste from masking tape. The rail jig cost less than $100 to make.
Steaming the rail for the other side of the board.
The rail for the other side of the board is clamped in place after steaming.
A nice tight overlap joint at the tail. I am surprised at how well the rail bends around the tail of the board. Steaming the rail helps.
A wooden wedge helps apply a little extra pressure at the tail.
A luggage strap helps to hold the rail at the nose end of the board.
Trimming the nose.
...and the tail.
Rail number three. The stainless steel ruler helps support the rail through the bend and stops it from breaking.
Rail number three before trimming.
The nose before trimming.
While I was building the Yang, Paul showed up with the Ying. Yoshi Takeda had just finished polishing the gloss coat that morning. The tint work is amazing. It's a shame we 're going to wax this puppy up, but it's all in the name of surf science.
Gluing rail number four.
Using the stainless steel ruler again to support the bending rail.
Strapping in the rail at the nose.
The tail ready for a trim.
...and the nose.
All trimmed up. Nice and neat.
The tail is done and now it's time for the cedar rails.
Gluing the first two cedar rails to the right hand side of the board. These were done two at a time and were steamed first. The cedar rails are 3 mm thick and are rotary peeled from a log. This makes them a bit of a challenge to work with as they tend to warp and twist.
That stainless steel ruler sure is handy for bending timer.
A luggage strap to hold the rail in place at the nose of the board.
Trimming the rail at the nose after the glue has dried. Polyurethane glue only takes a couple of hours to cure.
The tail before trimming.
Steaming the last of the cedar rails.
Waiting for the glue to cure.
A closeup of the nose.
...and the tail.
The nose all trimmed up.
The tail ready for a trim.
Trimming the top and bottom edges of the rails. I like to leave the masking tape on as it protects the timber from tool marks.
A sharp spoke shave and palm plane make quick work of this job. I take my time and find this part of the process is very meditative.
My little 5 year old apprentice with a dust brush. Usually he has a claw hammer and is on a search and destroy mission.
Some nice detail at the nose.
...and the tail.
The next step is the fun bit - shaping the rails.
I shape the rails with a spoke shave and 80 grit sandpaper on a foam pad. I then finish sand the whole board in 180 grit sandpaper. Shaping the rails usually takes me about 6 - 8 hours.
Ready for the first coat of epoxy on the top of the board. I haven't used West System resin before so this was a first for me. West System also have a 207 hardener which is specifically designed for wood.
I tape up the bottom so that I get a nice clean resin line.
I apply the resin using a squeegee and then use a gloss foam roller to get an even layer of resin over the whole board. I use a foam brush to get rid of any bubbles on the surface of the resin. The colour of the timber really pops out once the epoxy is applied. The paulownia turns a honey gold colour and the Suriname Cedar is rich brown and bronze depending on the light. I use 60 grams of resin on the top of the board and 60 grams on the bottom for the first coat.
The bottom of the board before the epoxy coat.
...and after.
Marking out the Futures fin box slots.
Marking out the hole for the leash plug.
My custom made Futures template. I wasn't keen on spending $150 for an authentic Futures jig and installation kit. Instead I made up a simple jig and used a 16 mm straight router ($11) bit and a 32 mm rabbeting bit ($22).
Routing out the slots for the fin boxes. An interesting thing about Futures fins is that you don't have to allow for any cant in the fin boxes. The cant is built into the fins themselves. The fin boxes are mounted perpendicular to the bottom plane of the board.
A close up of the fin slot.
I then seal the timber in and around the fin slot with some epoxy resin.
Drilling the hole for the leash plug. Paul wanted a heavy duty leash plug for this board hence the 35 mm hole.
I also seal up the timber around the leash plug hole with some epoxy.
Gluing in the fin boxes with black tinted epoxy resin. The resin is also thickened slightly with Carbosil a silicon based thickening agent.
Gluing in the leash plug.
After the resin has dried, I sand back the fin plugs flush with the bottom of the board. I found installing the the Futures fin plugs a little bit fiddly and not as easy as the FCS type plugs.
The same for the leash plug.
The Swedes sure make a mighty fine pear cider by the way.
Paul giving the whole board a wet rub with 240 grit wet and dry paper before the final epoxy coat.
The Ying and the Yang.
A final coat of epoxy on the top and bottom. 40 grams of epoxy on each side.
...and he can't wait to get his new woody wet.
↧
Wooden Surfboard Day 2014 - Currumbin Alley
This year's annual Wooden Surfboard Day at Currumbin on the Gold Coast was outstanding. With over 60 wooden surfboards on display from local and overseas wooden board builders, the event was a resounding success. Everything from Toothpicks to hand planes - longboards, fishes, kook boxes and stand up paddle boards were out on show. It was great to see such a variety of boards and building methods.
Some boards from Jason Oliver. Jason recycles old timber from pallets and other sources to create his boards. The SUP is the biggest I've ever seen. 11' long and 33" wide. Foam rails wrapped in paper bark.
The Ying and the Yang having a little rest in the shade.
Grant Newby doing the rounds on the day.
A Dovetail hand plane.
Geoff Moase from Dovetail Surfboards had a full rocker jig set up in his tent complete with board.
One of the Dovetail hollow wooden surfboard kits.
A few classic shapes from 85 year old Barry Regan. Still going strong. These boards are built from Paulownia and Gaboon marine ply.
Barry Regan and Grant Newby chewing the fat. Barry is a wealth of surfboard building knowledge.
In case you were wondering what those numbers mean (4B), they are an indexing system that Barry uses to document and reference all of his boards.
A pintail and simmons style longboard from the "Purveyor of Salty Sleds" (AKA Grant Newby).
Charl B. with his hotcurl and wood booger.
A classic.
Some boards from Jason Oliver. Jason recycles old timber from pallets and other sources to create his boards. The SUP is the biggest I've ever seen. 11' long and 33" wide. Foam rails wrapped in paper bark.
Another Jason Oliver creation. These boards have a unique rustic look to them.
A couple of SUP's from Matt Brady of Mackay. He drove for two days to get to the wooden board day. An absolutely awesome effort.
This board reminds me of the traditional Japanese "naminori furouto".
The guys from Bywaterdesigned had a shaping demonstration set up in the shade.
Discussing the finer points of wooden board building.
Lots of different shapes and sizes on display.
A beautifully hand crafted Alaia.
Some boards from Sergi Galano of Flama surfboards in Barcelona, Spain.
This board is made from Bansia. The grain is amazing.
The Dovetail logo.
This board appeared in the Nathan Oldfield surf film "The Heart and the Sea" as created by Paul Joske of Valla surfboards fame. Paul grew the paulownia on his property, milled it and crafted it into a chambered surfboard.
Geoff Moase and Paul Joske proudly showing off their creations.
↧
Postcards from "Lonnie" - Alaias, Paipos and Hand Planes
I recently received an email from Dallas at Point Lonsdale, which is a small seaside village on the coast of Victoria near Geelong. Go the Cats. Dallas is a self confessed Alaia hound and after he found some Western Red Cedar planks under his house he felt an unrelenting urge to pick up the tools and build one for himself. One thing led to another and before he could say "Saddle me sideways and call me Trigger", he had managed to build himself an entire quiver including a Paipo, an Itago and some hand planes. Here's his story.
My 7 year old son and I knocked up a paipo in the backyard in a day and waited patiently for three days while it was oiled. This board was made from the cedar stored under the house. Little did I know how good this thing would go! We live in a small coast village in Victoria, Point Lonsdale, and in the dying days of summer we took our creation to the beach for the first time. The consensus on the beach to those we knew and some we didn’t was that the board looked great and you could hang it on the wall. My son took off on his first wave and zipped along the small rollers, easily out-running his mate on a boogie board. It was awesome. By days end I reckon twenty kids had had a go on that board and half of their mothers & fathers too. Hours of fun!
Since then we've made several paipo, handplane, itago and alaia boards out of both western red cedar and paulownia. The one we made for my 5 year old daughter is simply known as the "blah blah" board from the design painted on it. The art work is just as important to the kids as the board. As much as I enjoy surfing all of these boards, the alaia is something else as it takes me back to the feeling of excitement when I first stood up on a board. At this point in time I am more proficient at making alaias than riding them. I have had a new lease on my surfing life much to my partner’s dismay as she wishes more things were done around the house other than board making!
There is also another dimension you cannot underestimate with these boards. They are "social". People want to talk to you when you have them. Since using our boards regularly at our front beach, many elderly people have come up to us and recounted stories with great pleasure of how they had wooden boards, apple crates or made boards after the war themselves to use at the front beach. We have found the local beach to have quite a tradition of wood board use. There is a mention from the surfresearch.com.au site of Point Lonsdale and a Grace Wootton being the first person to surf in Victoria on this very beach with a board brought back from Hawaii around 1915. We have also come across two wooden boards, possibly cedar, in the local maritime museum dating back to the same period.
↧
↧
Byron Bay Surf Festival 2014
Namaste hipsters. This was my first year at the Byron Bay Surf Festival (BBSF) so I guess that makes me a BBSF virgin.. I wasn't disappointed. The festival was a 3 day fusion of surf culture, food, art, film, literature and music. It was great to see a solid representation of wooden surf craft builders exhibiting everything from hand planes to dugout canoes. There were fin shaping workshops, hand plane making workshops and an awesome paipo shaping demonstration using traditional axes and adzes. Here's a few snaps for your viewing pleasure. If you get a chance to make it next year, you won't be disappointed.
Andy from Wooden Anchor giving a demonstration on how to shape a hand plane using an axe.
This dugout canoe was the brainchild of Tom Wegener and Dave Rastavich. It was carved from a single paulownia tree that blew down in a storm a couple of years ago somewhere near Cooroy/Noosa. The tree was salvaged by Tom after Bill Wallace, the famous toothpick builder gave him a call about it. The project was completed by Andy from Wooden Anchor. I was fortunate enough to have a go at paddling a canoe like this a few years ago on a surf trip to Tupira in Papua New Guinea.
The Surf Lit Lounge.
A selection of cosmic hand planes from Sting Glide.
This is one of Nobuhito (Nobby) Ohkawa's creations. Beautifully book matched timbers and immaculate crafsmanship.
Another Nobby creation. Nobby has his timber cut from a single log and each piece is marked so that the grain can be matched.
Some of Tom Wegener's "Surfie" belly boards.
Wooden fin shaping workshops run under the guidance of Nobby.
Tom Wegener discussing the finer points of belly board design.
A hand plane shaping workshop run by the guys at Grown Surfboards.
A Grown timber surfboard creation.
Andy from Wooden Anchor giving a demonstration on how to shape a hand plane using an axe.
A nice selection of paulownia timber boards, hand plane and paipo blanks from the folks at Wooden Anchor.
What a cool car. From the guys at Grown Surfboards.
Grant Newby was flat out with a ton of inquiries about his boards.
Hmmm, curry cones from Pocket Curries. These puppies rock.
The entertainment was going for the whole day. Great music.
The crowds were enjoying the food, the sounds and the sunshine.
Plenty of surf art out on display.
Andy from Wooden Anchor giving a demonstration on splitting a timber slab from a solid paulownia log and shaping it into a paipo.
Dave Rastavich and Tom Wegener offering a bit of encouragement.
Andy uses a selection of steel and wooden wedges and a sledge hammer.
The timber slab is then cut smooth with a range of traditional adzes and axes. Andy has an amazing selection of tools handed down from his father and grandfather.
Shaping the paipo using a Swedish carving axe.
And some final touches using a "Scorp".
A budding wooden board builder with is Mum.
A bite of lunch with some ambient music.
A Tom Wegener "Surfie". I couldn't get over how thin they are (10 mm).
Fins glorious fins.
↧
Building a Foam Core Wooden Surfboard - Mike's 8' Hotdogger
Namaste Hot Doggers and welcome to my latest wooden surfboard project, an eight foot woody for my mate Mike. Mike was keen to add a wooden board to his quiver and approached me to see if I could design and build one for him. Many years ago, back in the seventies, when a Brazilian was someone who played soccer and armpit hair, Chiko Rolls and Sandman panel vans were all the rage, Mike was a young grommet living on the Gold Coast. He was given a board as a birthday present by his then boss who worked next door to a local shaper. The board was called a "Hotdogger" and shaped by Ken Adler of San Juan Surfboards fame. It was essentially an egg shaped board and it went like the clappers but unfortunately Mike surfed it to death and it is no more. It was a fairly unique board for its time and Mike used to cop a bit of flack over it from his mates. It was affectionately referred to as Mum's Ironing Board (MIB).
Being a sentimental type of chap Mike was keen to relive the glory days of his surfing past so we set about designing and building a replica board based on his beloved Hotdogger. In his youth, Mike was a 6'5" streak of duck shit but since then he's put on a few kilos so we beefed up the volume of the board to make it a touch more floaty than the original.
Here's some photos for your viewing pleasure.
The outline and rocker is based on mathematical ellipses. I used a graphing application to plot the shapes and then imported them into AKU Shaper as image boards.
Gluing on the inside rail bands. I used a custom made Luthier's iron to heat and bend the paulownia strips.
My custom made Luthier's iron.
The inside rail bands trimmed up and ready for the top and bottom skins.
The top and bottom skins. Sanded, taped and ready for gluing to the blank.
The polyurethane glue is applied to the blank with a squeegee.
The skins are taped in place.
...and the board is slipped into the vacuum bag.
2 - 3 hours later after the glue has dried and all trimmed up.
The tail is trimmed ready for the tail block.
The nose is trimmed for the nose block.
Some spiritual artwork.
The right side rail bands are glued on, three at a time.
After 2 - 3 hours the board is removed from the rail jig.
All trimmed up and ready for the opposite side.
The left hand side rails being glued on.
Trimming the rails with a palm plane and spoke shave.
The nose.
The tail.
Gluing on the tail block.
...and the nose block.
Ready to have the rails shaped.
The rails are shaped and sanded and the board is ready for its first coat of epoxy resin.
The nose block.
The tail block.
Taping up the bottom before applying the epoxy to the deck.
Weapons of choice.
Applying the epoxy.
Using a squeegee to spread out the epoxy. No need to be too precise as the roller will help get an even application of resin over the board.
A brush over with a foam brush removes any bubbles.
Now to the bottom of the board.
Cutting the fin slot with a custom made jig and trimmer.
Drilling the leash plug hole.
The leash plug hole ready for the plug.
Gluing in the centre fin box with thickened (pigmented) epoxy resin. The ice block sticks (hot glued to the fin box) help to align the box perpendicular to the bottom of the board.
Gluing in the leash plug.
A final coast of resin all over and a wet rub with P240, P360 and P600 grit wet and dry sand paper.
I pyro pen the board's dimensions along the stringer.
Some sound advice.
The board weighs in at 6.6kg
In communion with nature.
Another happy customer. He just can't wait to get his Hotdogger wet.
Ride Report March 2015 (by Mike)
In communion with nature.
Another happy customer. He just can't wait to get his Hotdogger wet.
Ride Report March 2015 (by Mike)
"I love the way this boards feels. It's loose and picks up speed in turns. I've only surfed it in small waves so far. I've got back into surfing recently after a 20 year hiatus but couldn't really get the hang of surfng a long board. This one is 8' but I can surf it like the single fins I used to ride in the 70's."
Mike surfing the Hotdogger at Currimundi.
↧
Paulownia Timber Supplies
For those of you looking for Australian plantation grown paulownia timber for your next wooden surfboard or marine project, Stuart Bywater of Bywater Designed is now supplying quality grade paulownia.
Stuart has a range of precut board sizes and can supply custom sizes to suit your needs. No order is too big or too small with delivery to anywhere in Australia.
A range of rough sawn and dressed Paulownia boards are available.
Paulownia Lengths of 2.4 or 3 meters
200 * 8 rough sawn
200 * 6 dressed 2 faces
190 * 6 Dressed 2 faces
Panels made to order
570 * 5, 4 or 3mm
600 * 5, 4 or 3 mm
For pricing go to http://bywaterdesigned.com/paulownia-timber-sales/
Call 0414 283 818
For more information contact Stuart at timber@bywaterdesign.com.au
↧
